
The Kasperle Kitchen
What are the birthday wishes of a three-year-old? Both a "Kasperle" puppet theater and a kids' kitchen were long-standing items on the list. Why not simply combine the two?
The pressure was considerable because the birthday was quiet close.

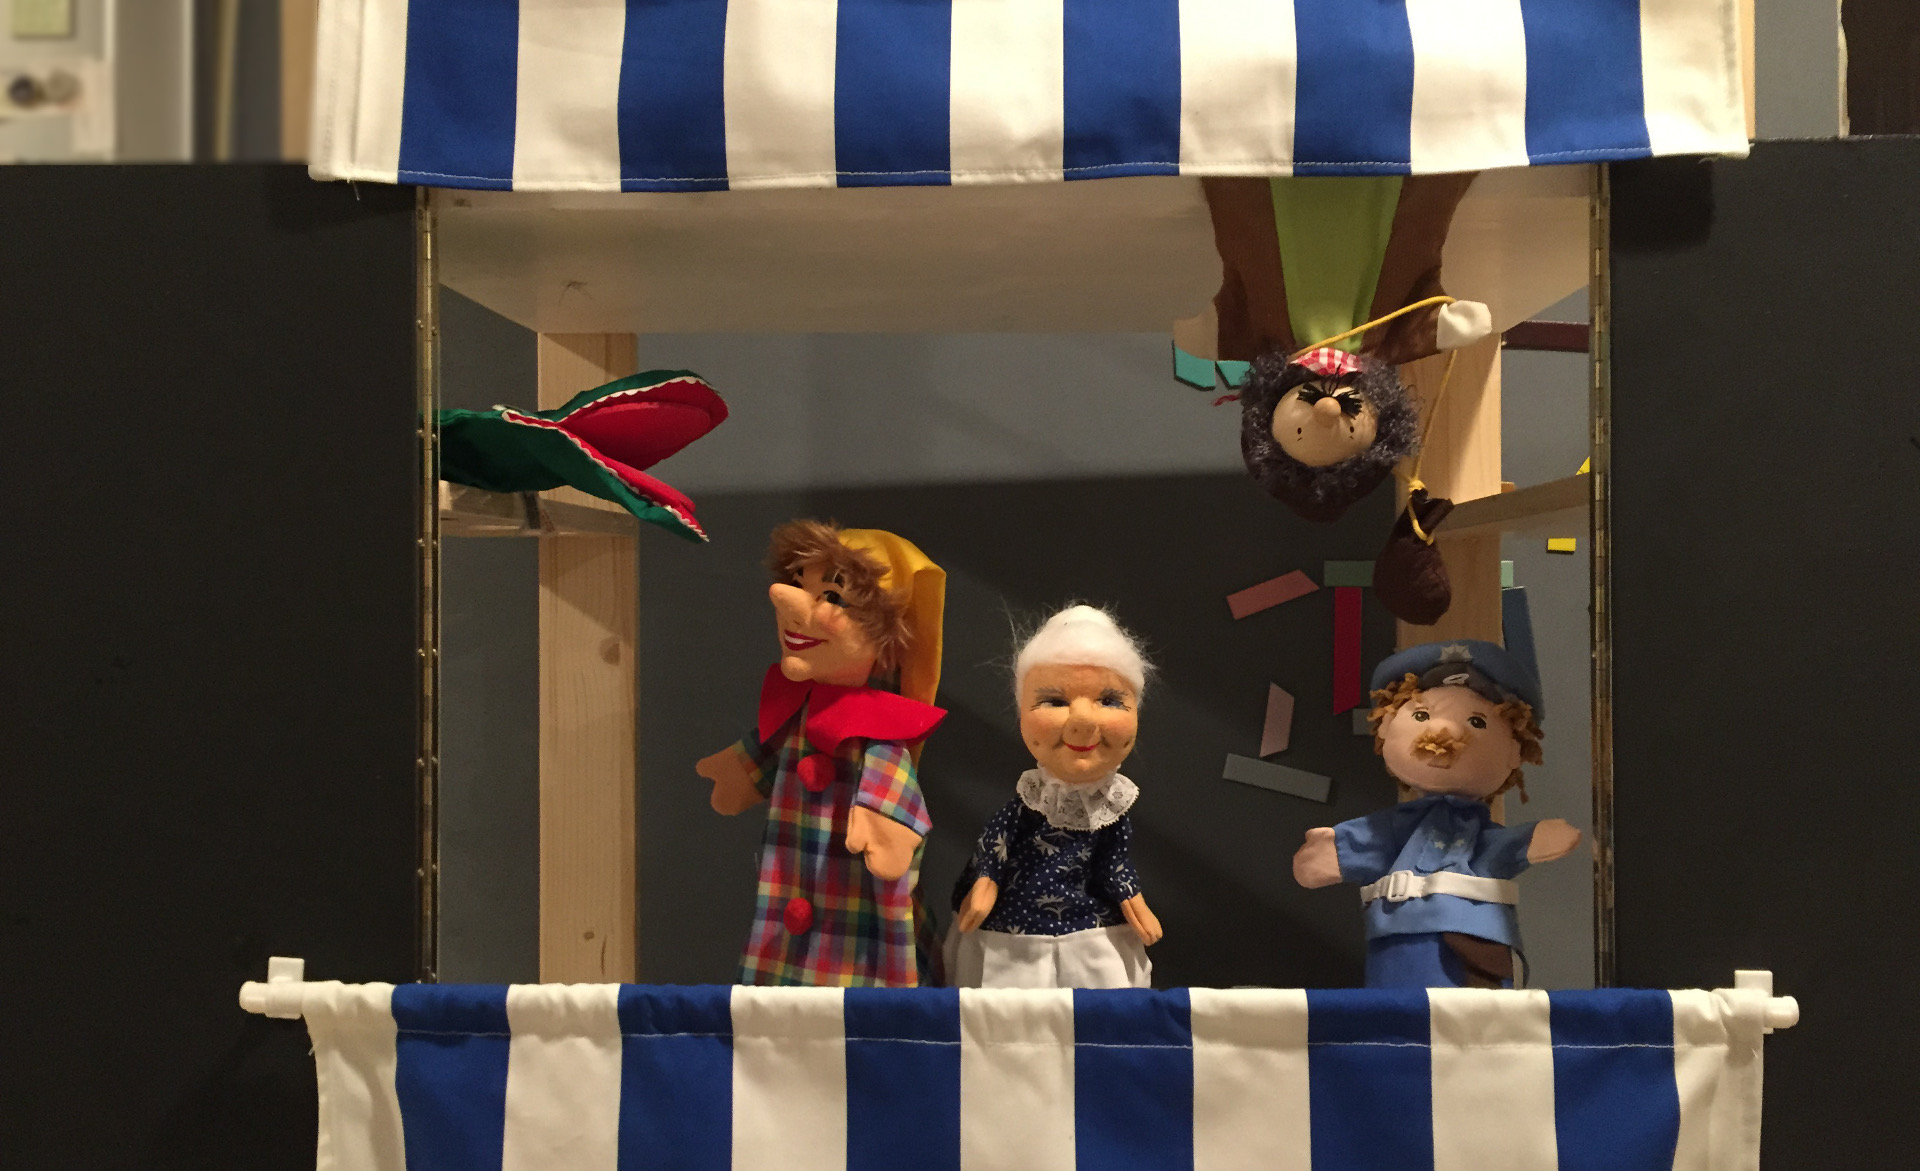
The Kasperle theater is a very old German puppet theater tradition that every child in German speaking countries know.
Kasperle is the hero, invincible, always joking, Fearless is his middle name. He is the one that always greets his little spectators with a "hello, children, are you all there?" before his adventures begin. His friends Gretel and Seppel often get into serious trouble and are then inevitably saved by Kasperle. On the good side there is also the grandmother, the princess, and the policeman, the evil side is well represented by the crocodile, a mercyless grandmother-swallowing-machine and the thief, a smelly villain always after the princess and her belongings.
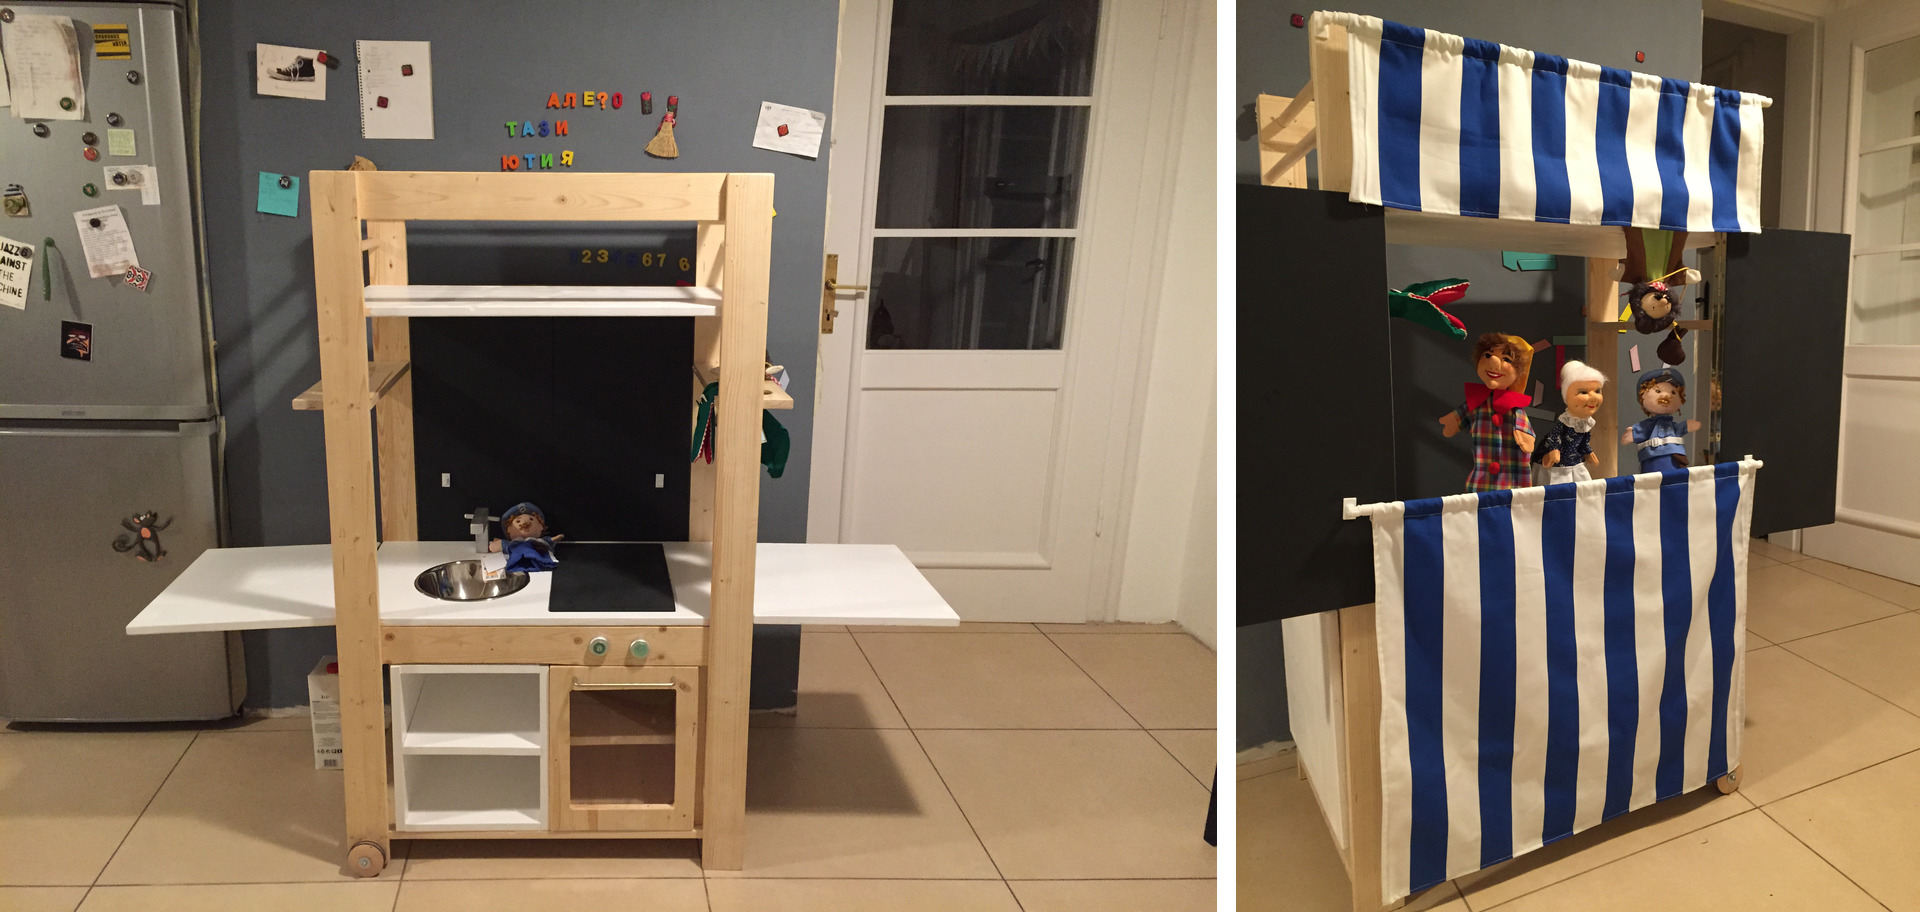
Puppet theater from one side, kids' kitchen from the other
Surprisingly, Google produced very little hits for the combination of a Kasperle theater with a kids' kitchen. I decided to use instructions by mein-eigenheim.de as the base for project.
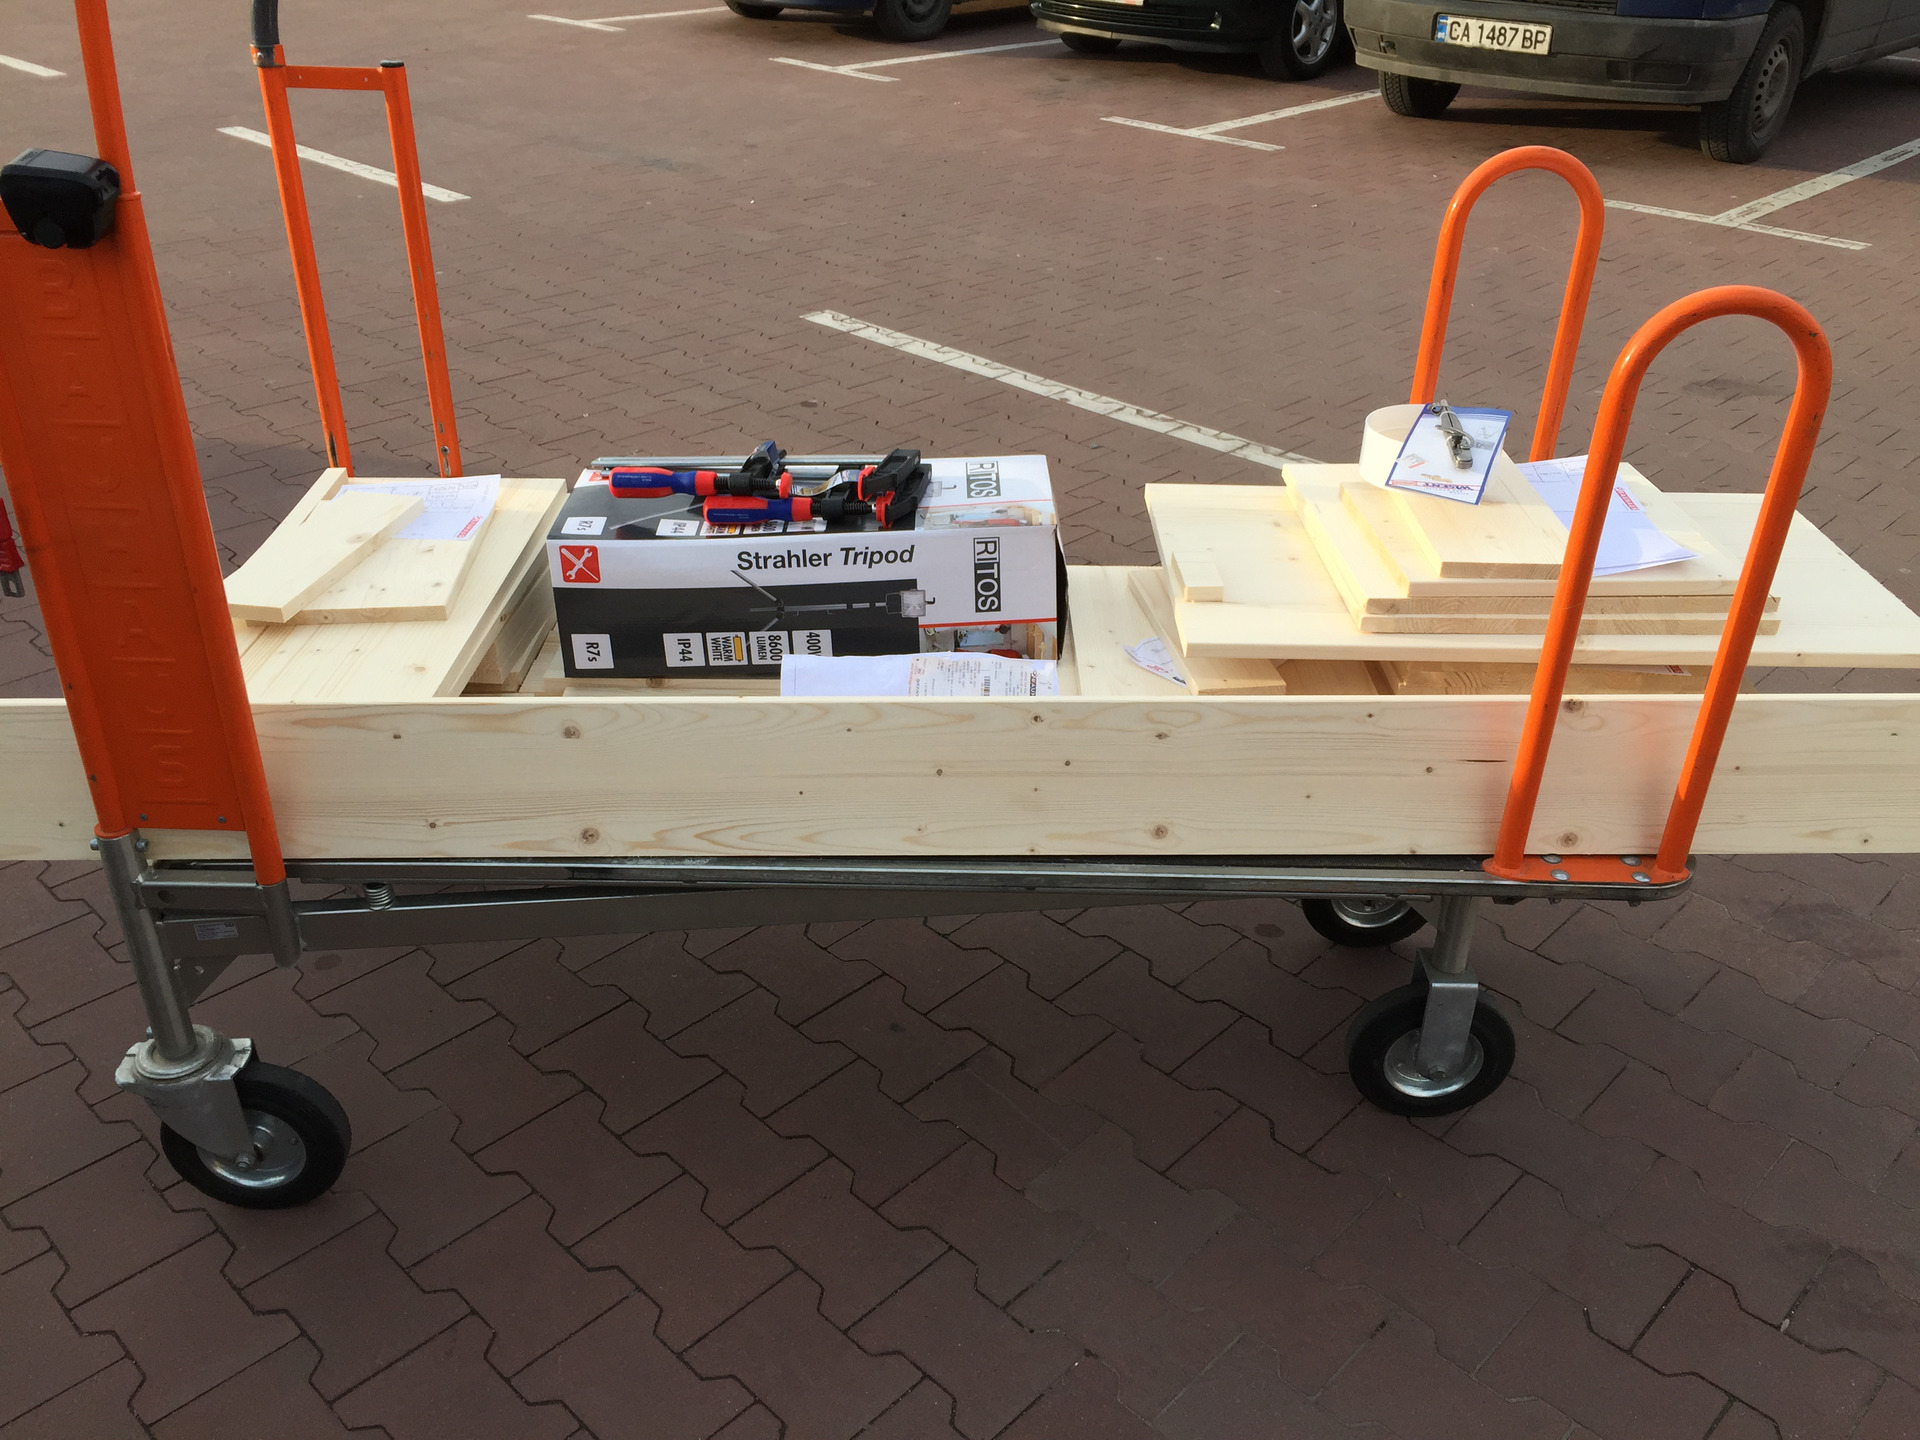
DIY Shopping
The first (of five!) shopping tours to the DIY store offered the first disappointment. Ply wood with 20 mm thickness is not available here, actually no wood at all with 20 mm thickness in suitable sizes. In the end I opted for pine wood. This was also not available in 20 mm but in 18 mm thickness. The two topmost wooden struts that connect the front and rear frame now had to become 4 mm longer but that was the only change required to the original plan.
The wood
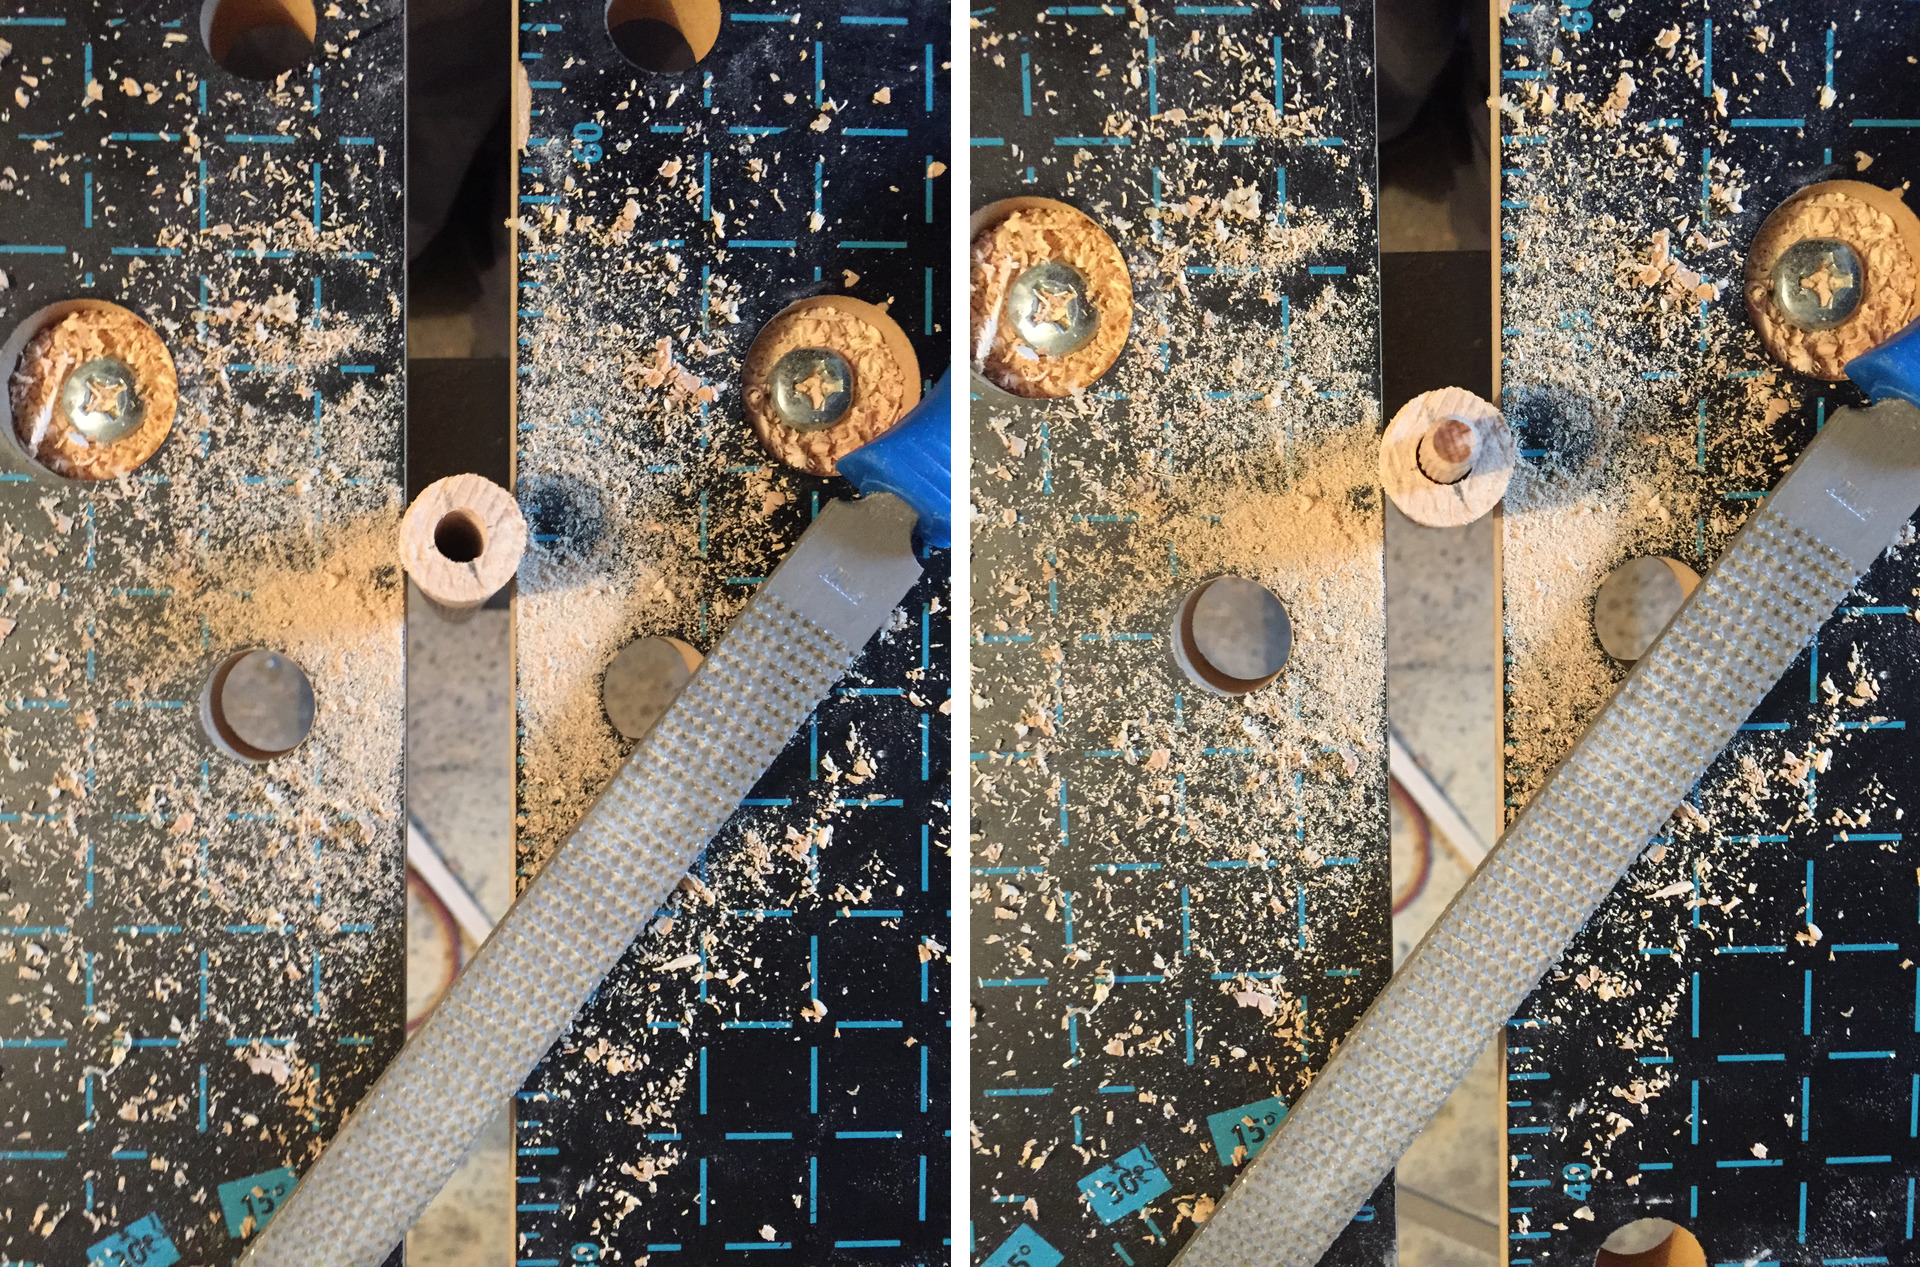
Short of a biscuit joiner (no! why should that be a stupid idea for a present just because it's expensive?) I had to go the conventional way with wooden dowel pins. The original instructions recommend dowel pins of ⌀ 8mm. Those are 40 mm long which means that that they are too long for a connection of 2 pieces of 20 mm thickness which meant that I had to shorten them one by one with the rip saw.
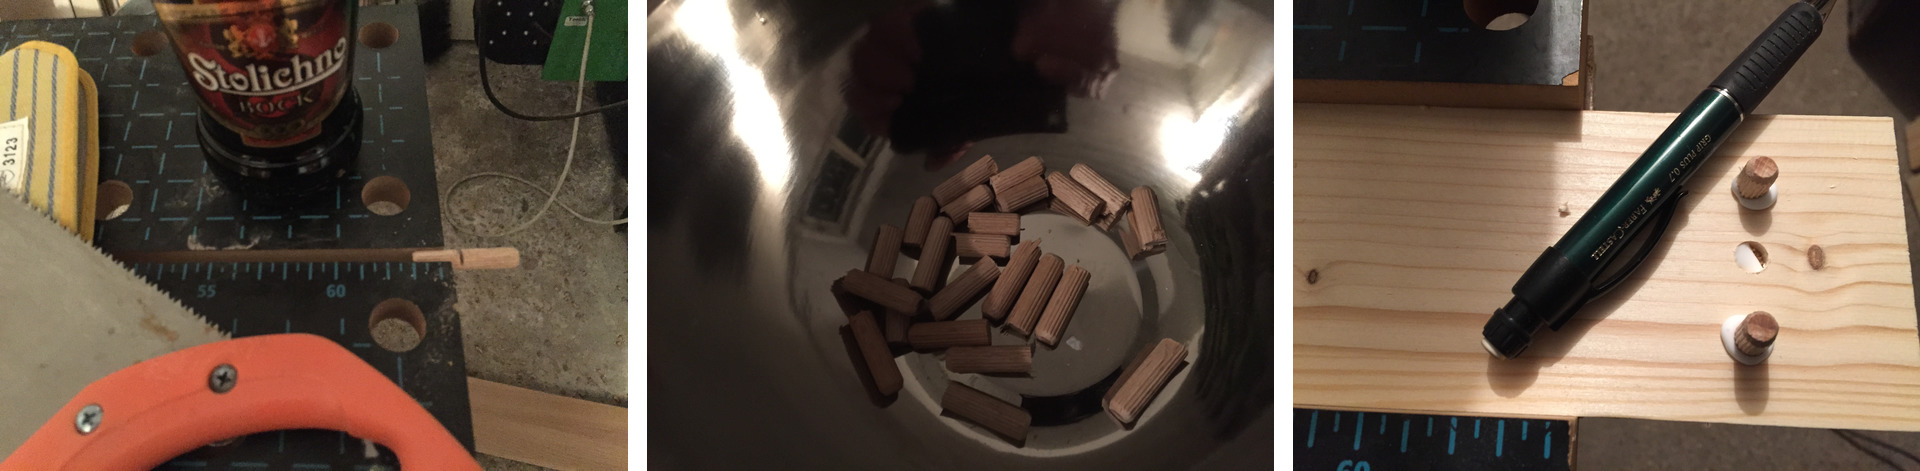
Too long, and too thick
Most of the connections have to be made at right angles. With a thickness of 18 mm that gives you only 5 mm of wood around the holes. Too risky for my taste. I used 6 mm dowel pins instead.
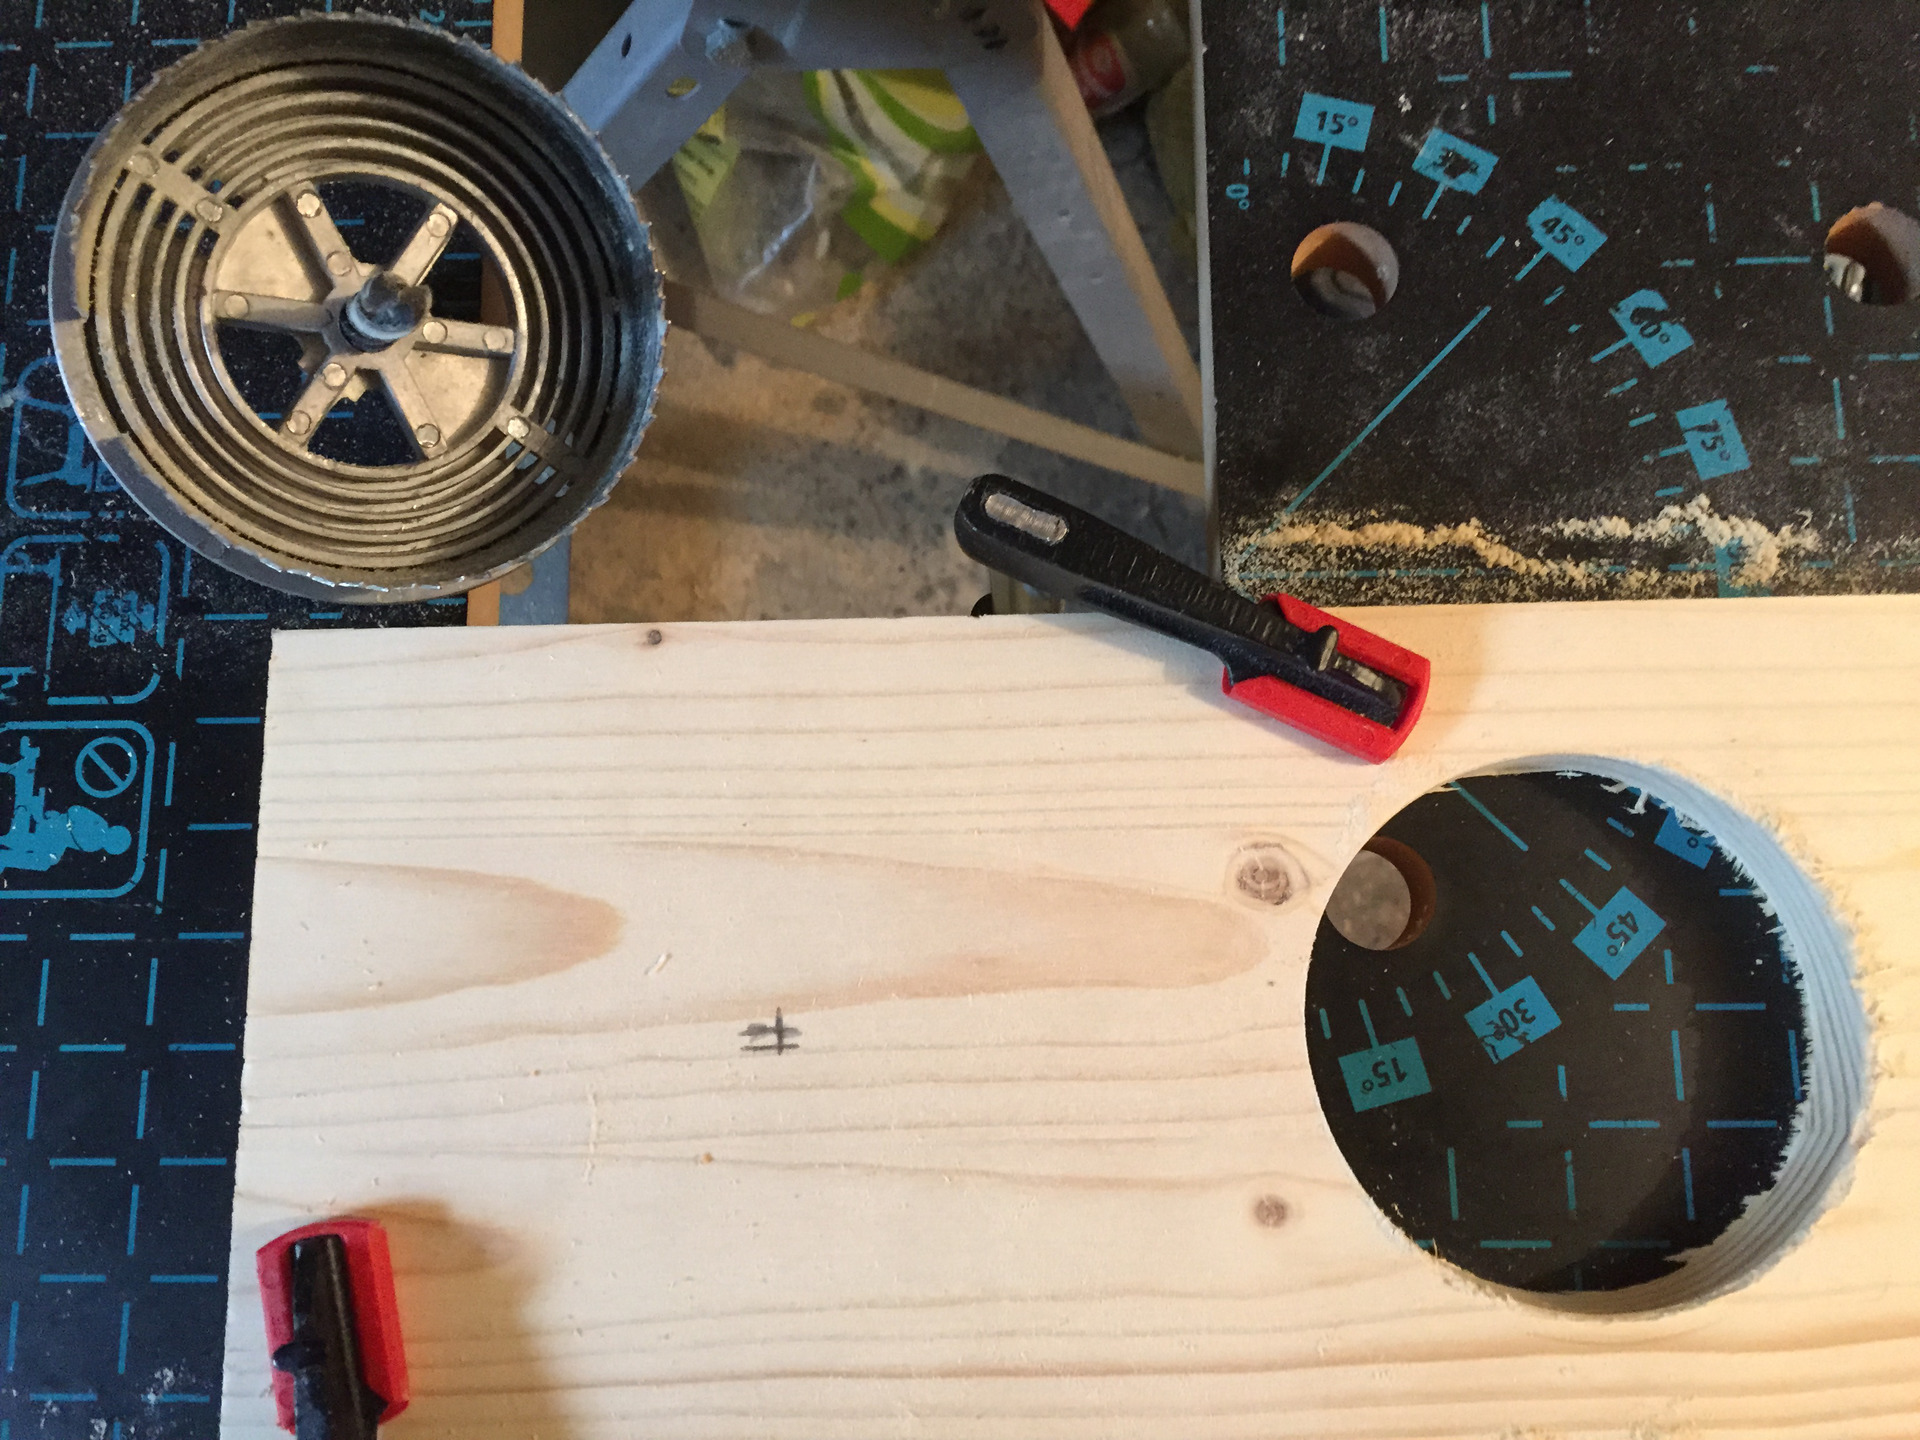
The Oven Door
The cut-out of the oven door was made with a jig saw. In order to give it that special coolness factor, acrylic glass of 4 mm thickness was screwed to it from the inside. However, the drill was garbage after the holes had been made because it was clotted with melted acrylic.

The oven door
The four wooden struts that connect the front and rear frame were made with wooden dowel rods ⌀ 20 mm, with centric holes for the 8 mm dowel pins.
The wood is quite hard, when drilling from this side
In order to glue together the big parts you need clamps with an opening of 500 mm or more.
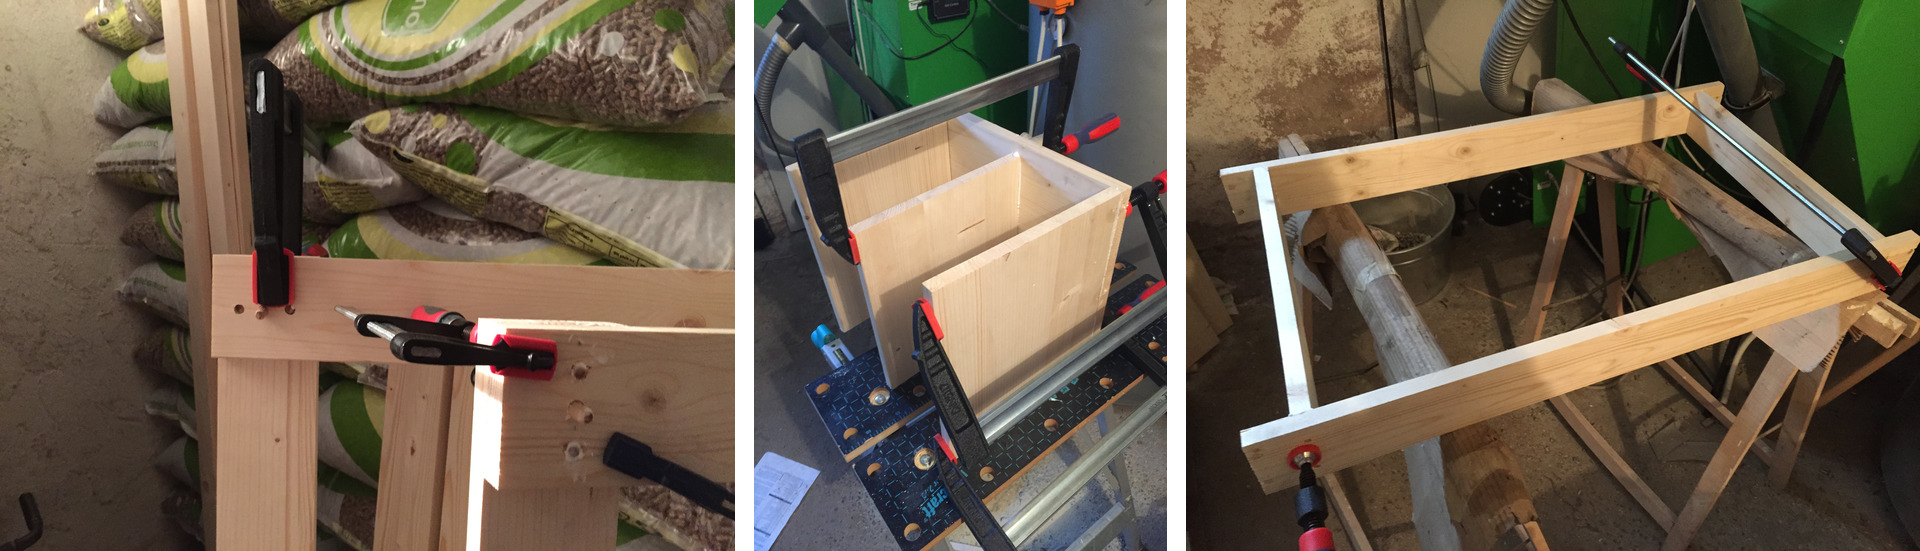
The glued connections are a lot stronger, when using clamps
The Hob
The hob had been delayed because I was unsure about the optimal solution. The original idea was to paint cooking plates on the white counter-top. However, Aleko does not know cooking plates but only hobs. And that saved his dad from drawing accurate circles with a brush on the white background.
In fact, even drawing the shape of the rectangular hob looked way too challenging to me. I cut out the hob with a jig saw from a wood pulp board, painted it black and glued it to the countertop. Actually I wanted to draw some realistically looking red-orange circles on it but failed miserably with it. Fortunately I painted the hob with chalk color so that they can now be painted on the hob, when they are needed, and wiped away afterwards.
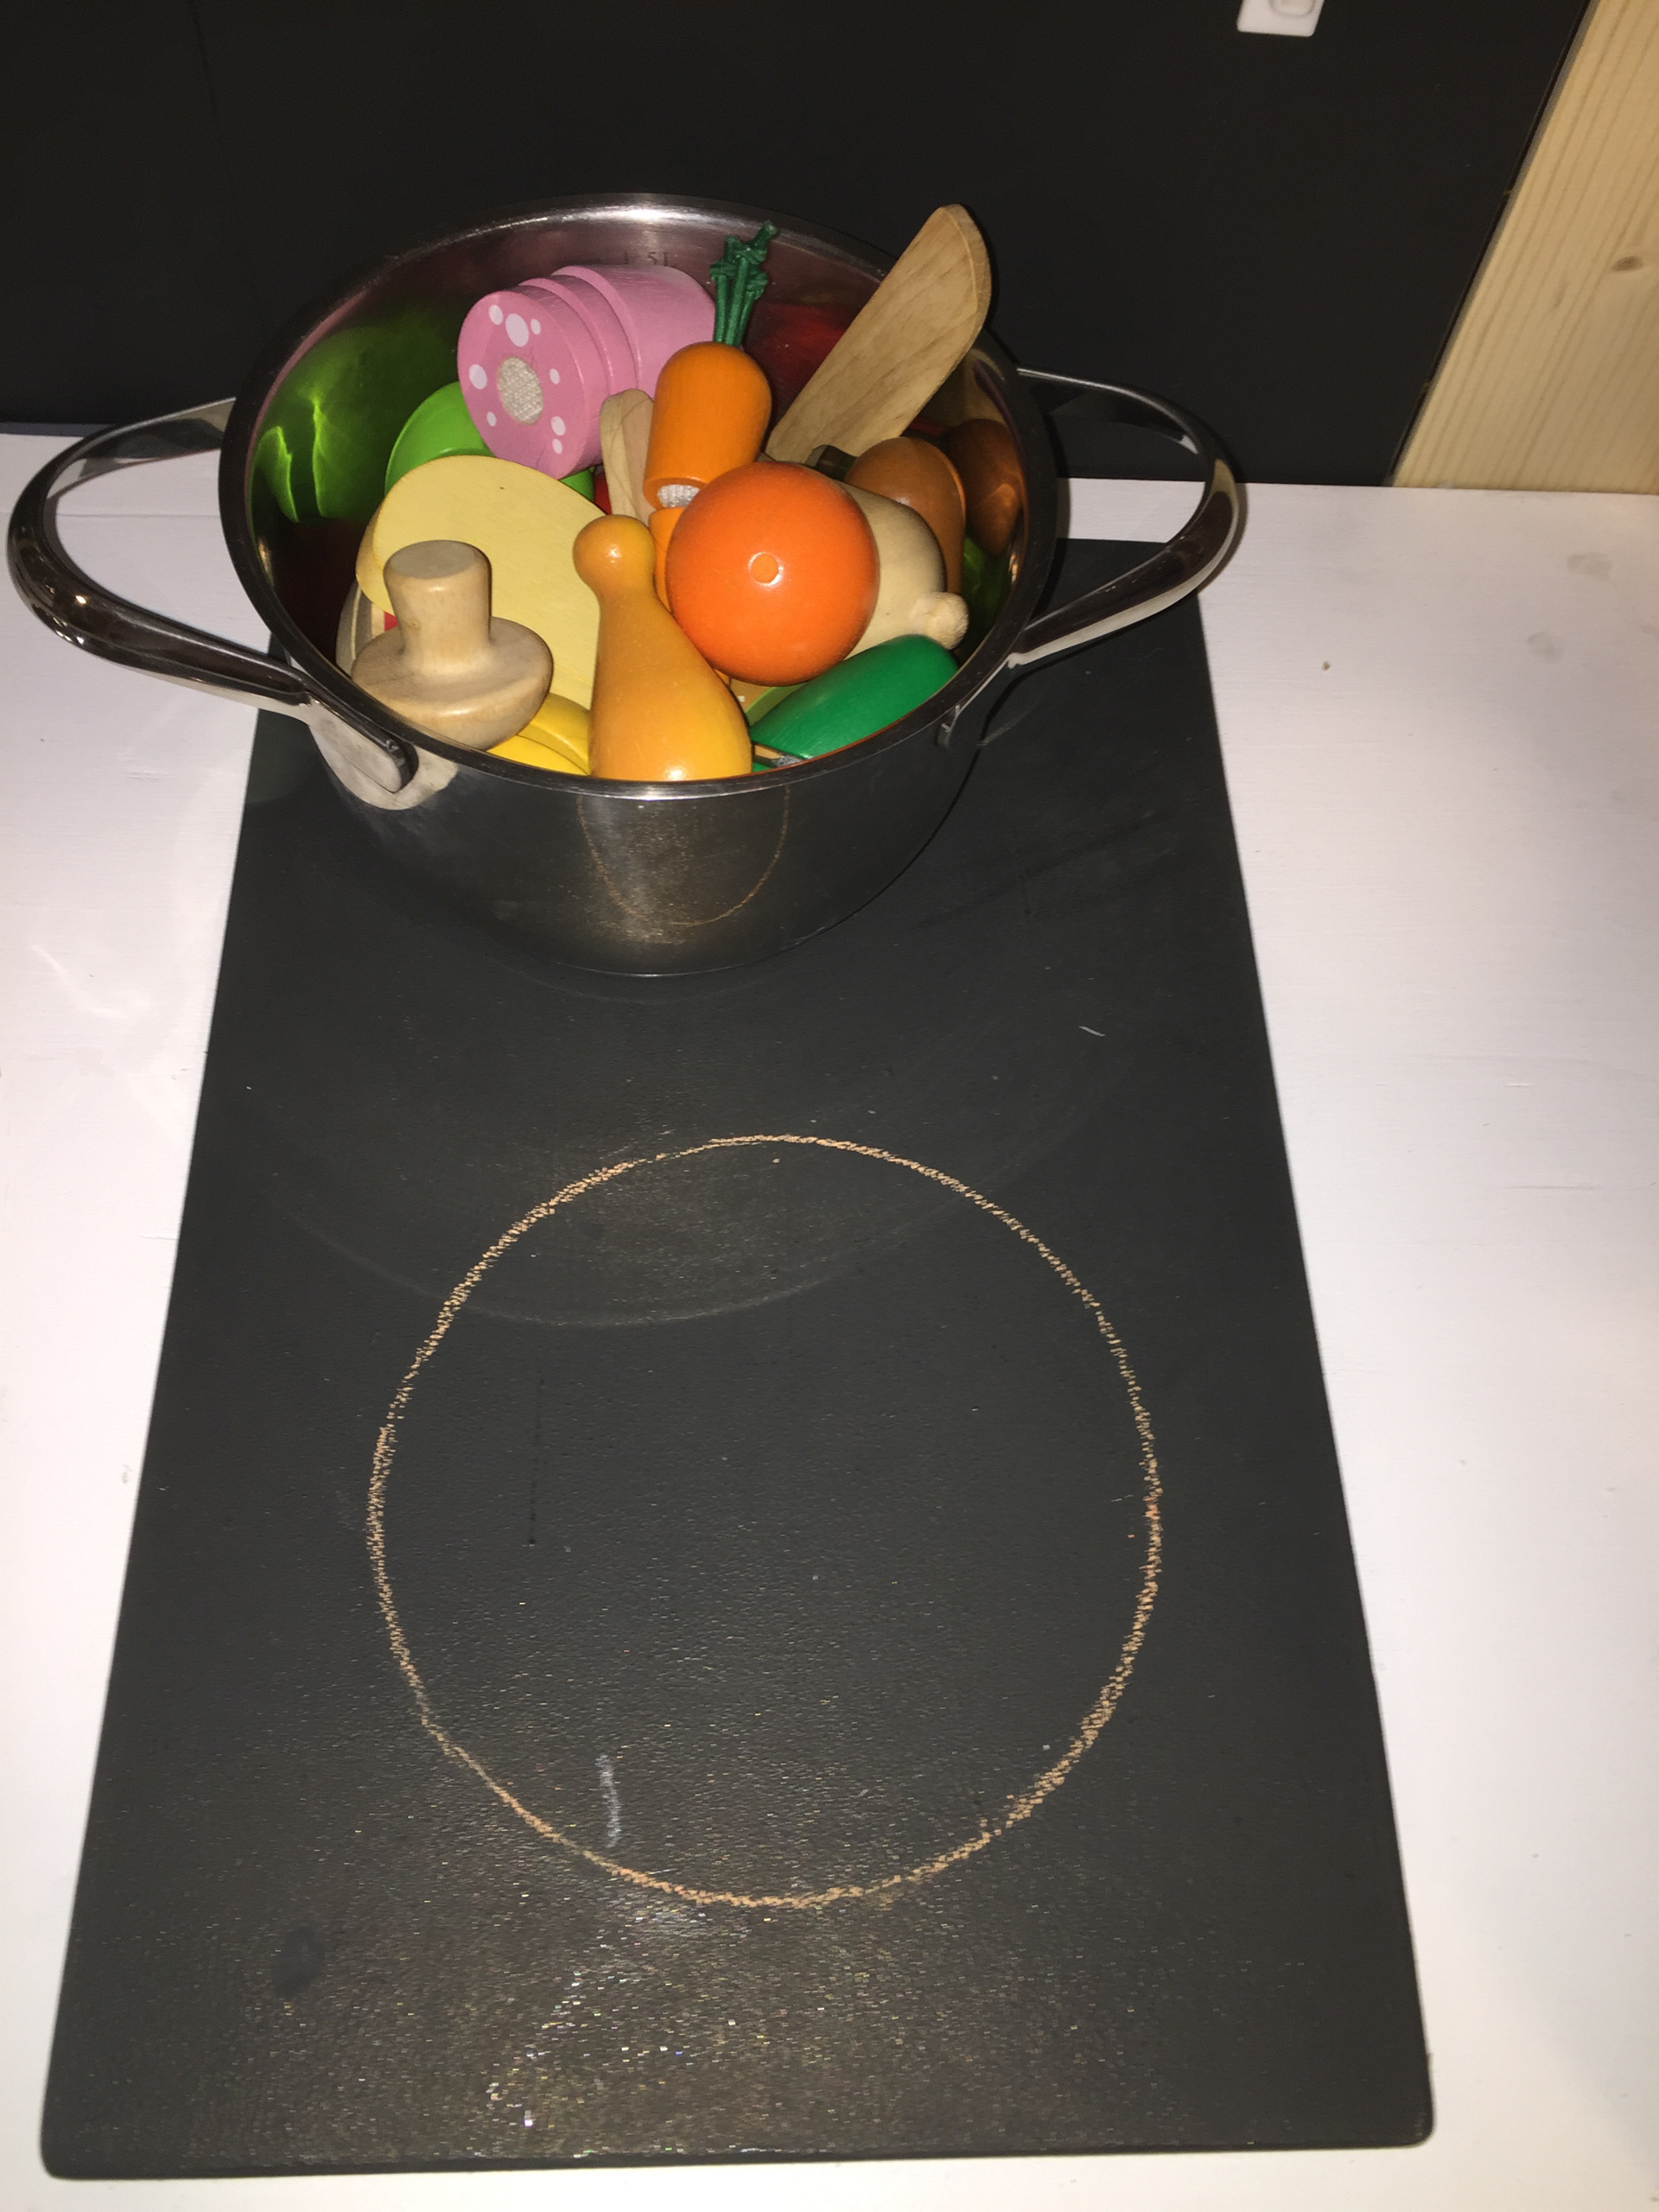
The size of the plates can be changed very easily, when drawn with chalk
The next time I would probably try to find the hob of the kids' kitchen DUKTUG by IKEA as a spare part. It has real buttons and is backlit and Aleko loves to play around with it, when we are shopping at IKEA. However, now that I search an image of it, it looks like it is no longer for sale.
The Sink
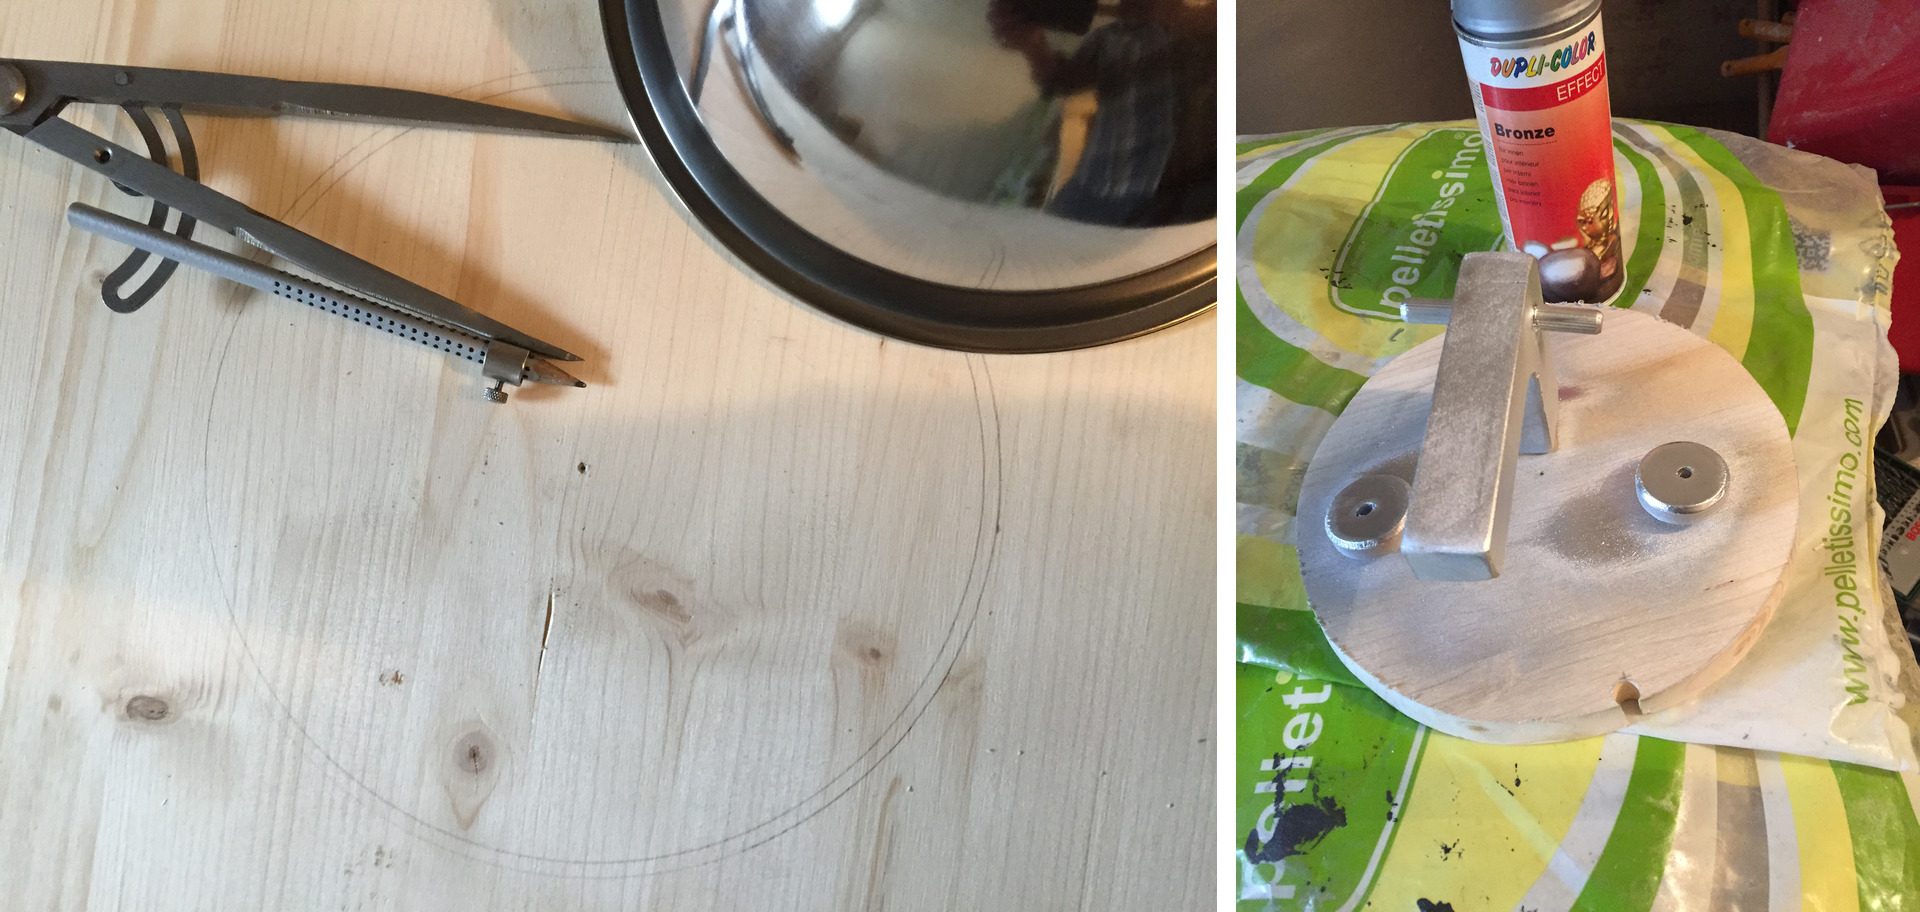
Finding the right kitchen sink took a while. There is a plethora of metal bowls but only few of them have an edge wide enough so that it does not fall through the hole. Finally I found one by Fackelmann, ⌀ ca. 24 cm.
The faucet had been cut out with a jig saw from 26 mm thick pine wood board. The handles for the hot and cold water were supposed to be 20 mm in diameter but my hole saw cannot cut holes that deep so that I used fluted wooden dewel pins instead.
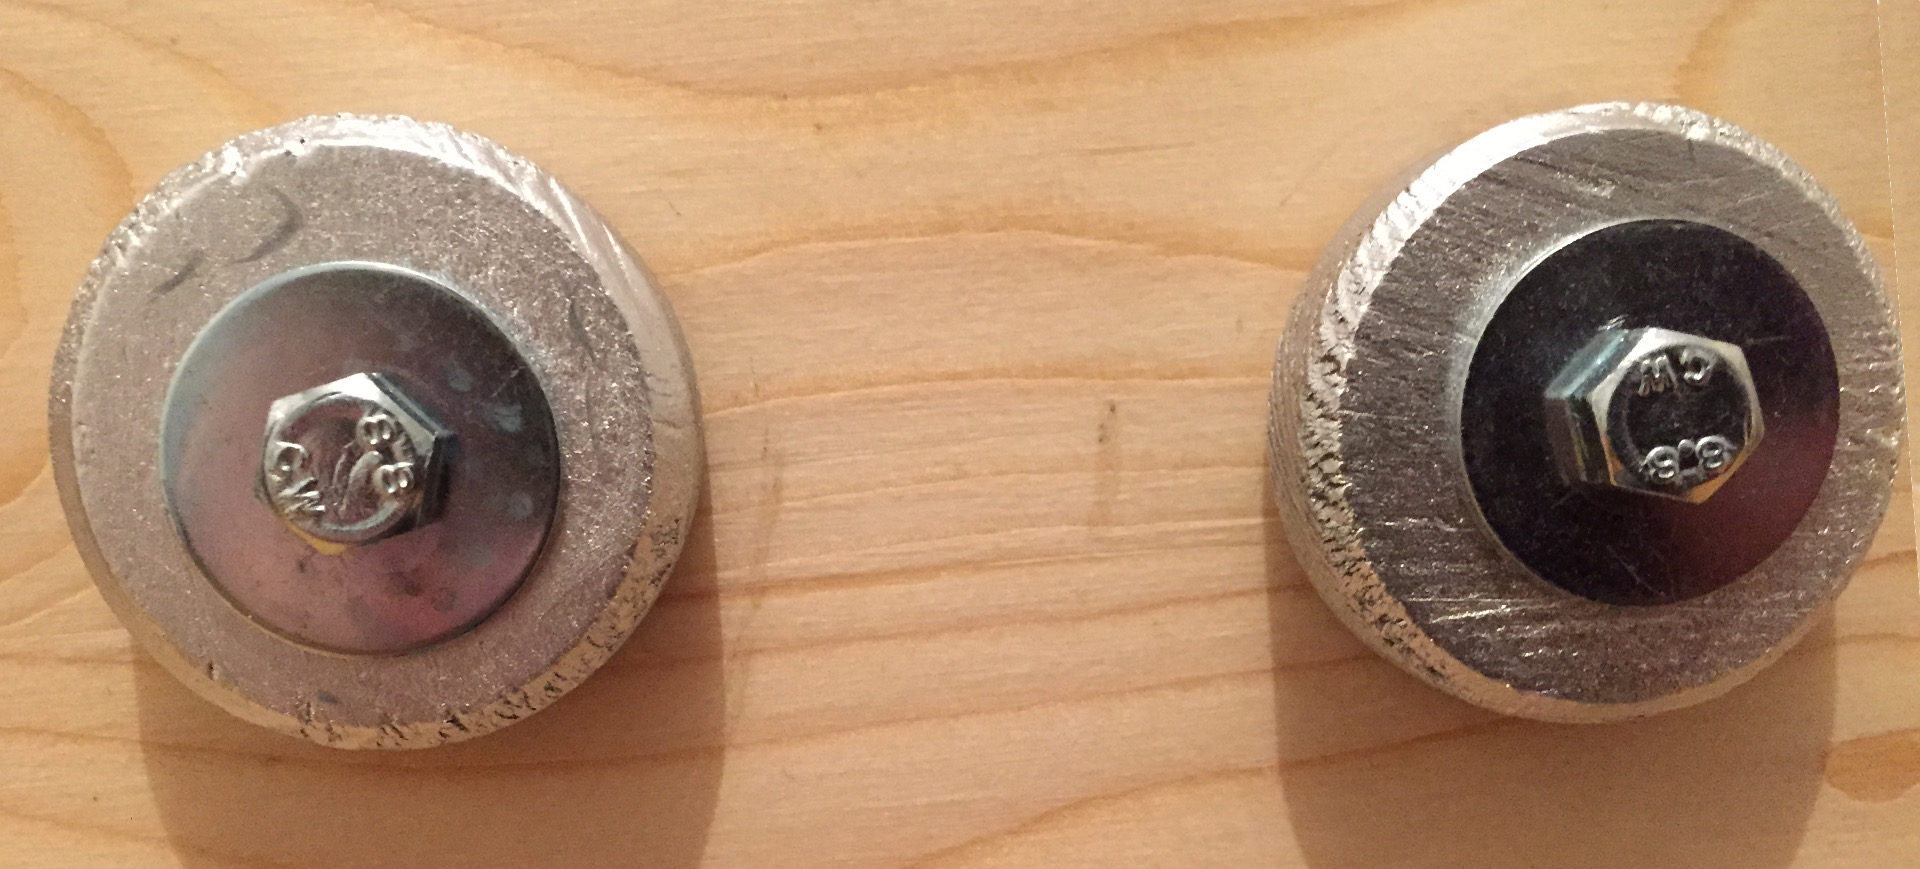
The buttons of the oven were made of some wooden plugs. I have no idea what they are actually meant for but you can find them next to drills, wall plugs and dewels in the large hardware stores.
All metal parts were finally coated with a metallic spray, while attached to the cut-out for the sink.
While painting, the parts were fixed on a wood rest
Shelves
There were shelves supposed to be attached to the doors as well, but that looked rather ugly to me. The shelves at the sides were supposed to use some slide-in technique but I considered that overkill and fixed them with dewel pins instead. I cut holes ⌀ 110 mm into one of the shelves so that they can hold some metal baskets or so in the future but I still have not found anything suitable.
Cutting the holes into the shelves
Sanding and Lacquering
The sanding and lacquering should be done before the final assembly of the frames and shelves. I used a belt and a delta sander, starting with a grit size of 80, then 180, and finally 240 for the finishing.
For the white and transparent parts, two to three coats of a a water-based lacquer suitable for childrens' toys had been used.
For the black doors I chose magnetic blackboard paint by Dulux but that turned out to be a mistake. Even after eight (!) coats the doors are only slightly magnetic. The magnetic paint by Marabu is way better. It also takes at least five coats but the surface is then really magnetic.
Hinges
For most of the hinges I used piano hinge cut to the required size and fastened with counter-sunk screws 4x12. For the side arms that support the lateral counter-tops I opted for more stable brass-colored galvanized hinges.
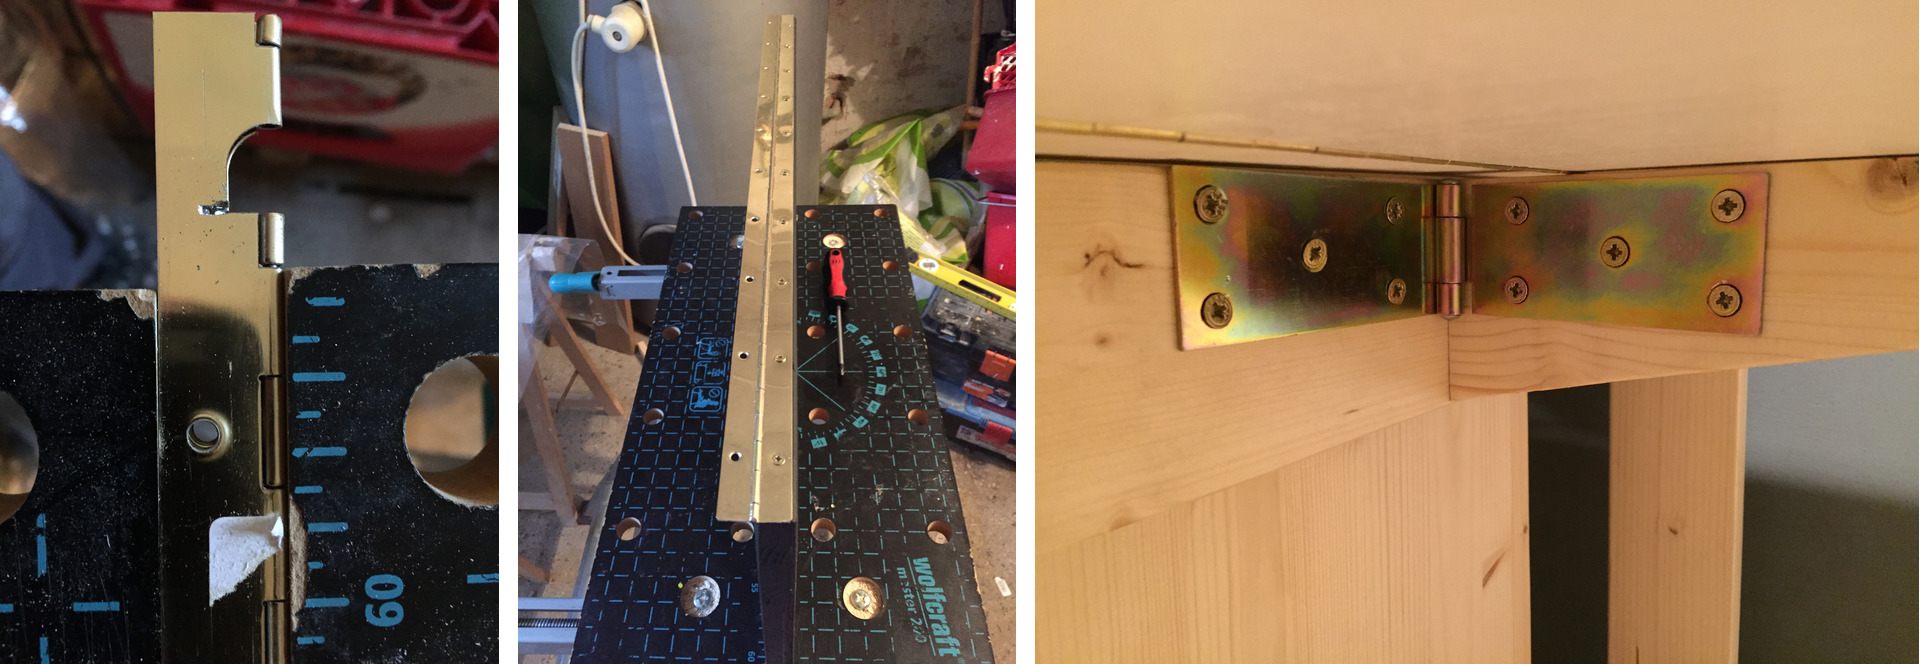
The various hinges
The Wheels
The original instructions suggested wooden wheels ⌀ 15 cm but those were not available here. Instead, I improvised with wooden casters, a metal pipe, a threaded rod and a couple of washers and acorn nuts. The plate of the casters with the revolute joint has to be removed for that. It is not used.
The metal tube has to be cut to 486 mm length and is inserted into two holes (10 mm) in the front and rear frame. The threaded rod is then inserted into the metal pipe. A washer separates the frame and the wheel. The wheel has a metal bush inside that protects the wood from the threaded rod. At the outmost end another washer and an acorn nut fix the construction on both sides.
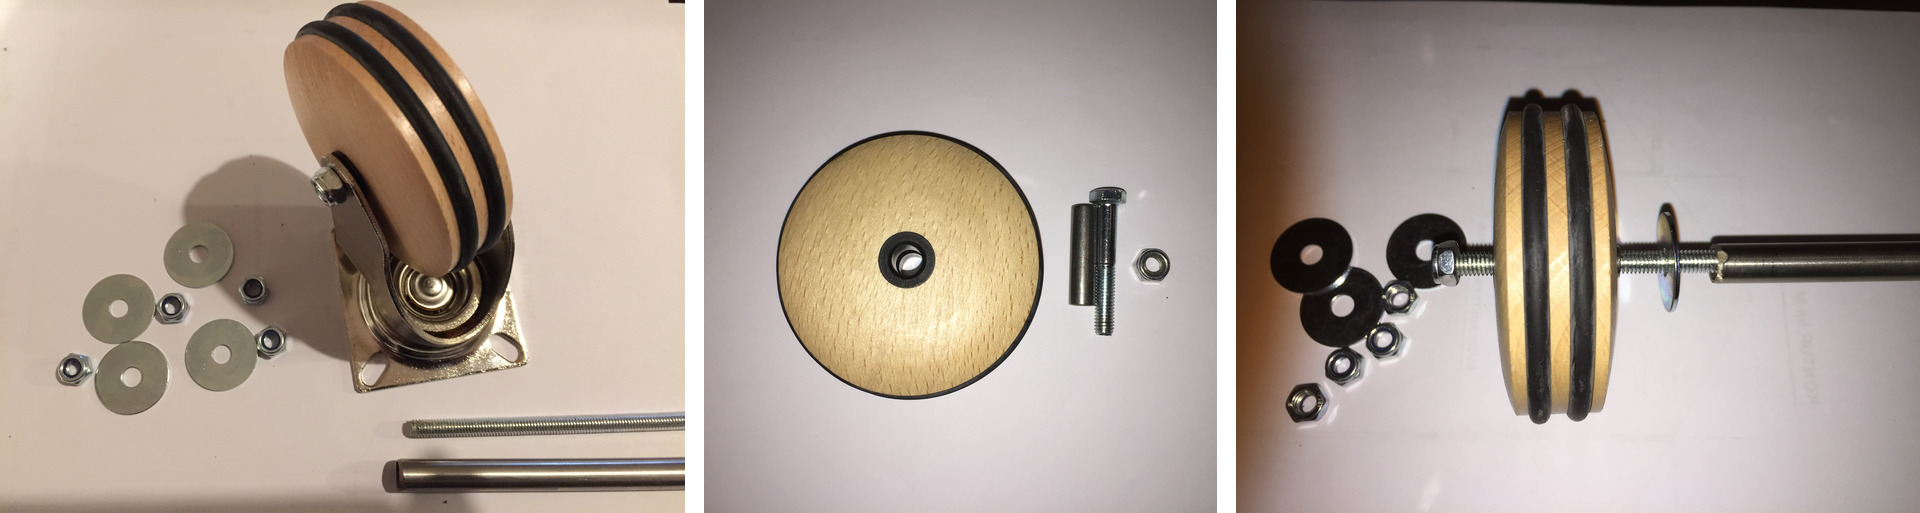
The outmost washers are still missing on the image.
For the threaded rod and the pipe you should allow for a little reserve when buying them as the exact length can only be found by try and error. The original bolts of the wheels that were used as their axis had later been used for fastening the round oven buttons.
Upcycling of the old axes of the casters, unfortunately not exactly centrically fixed
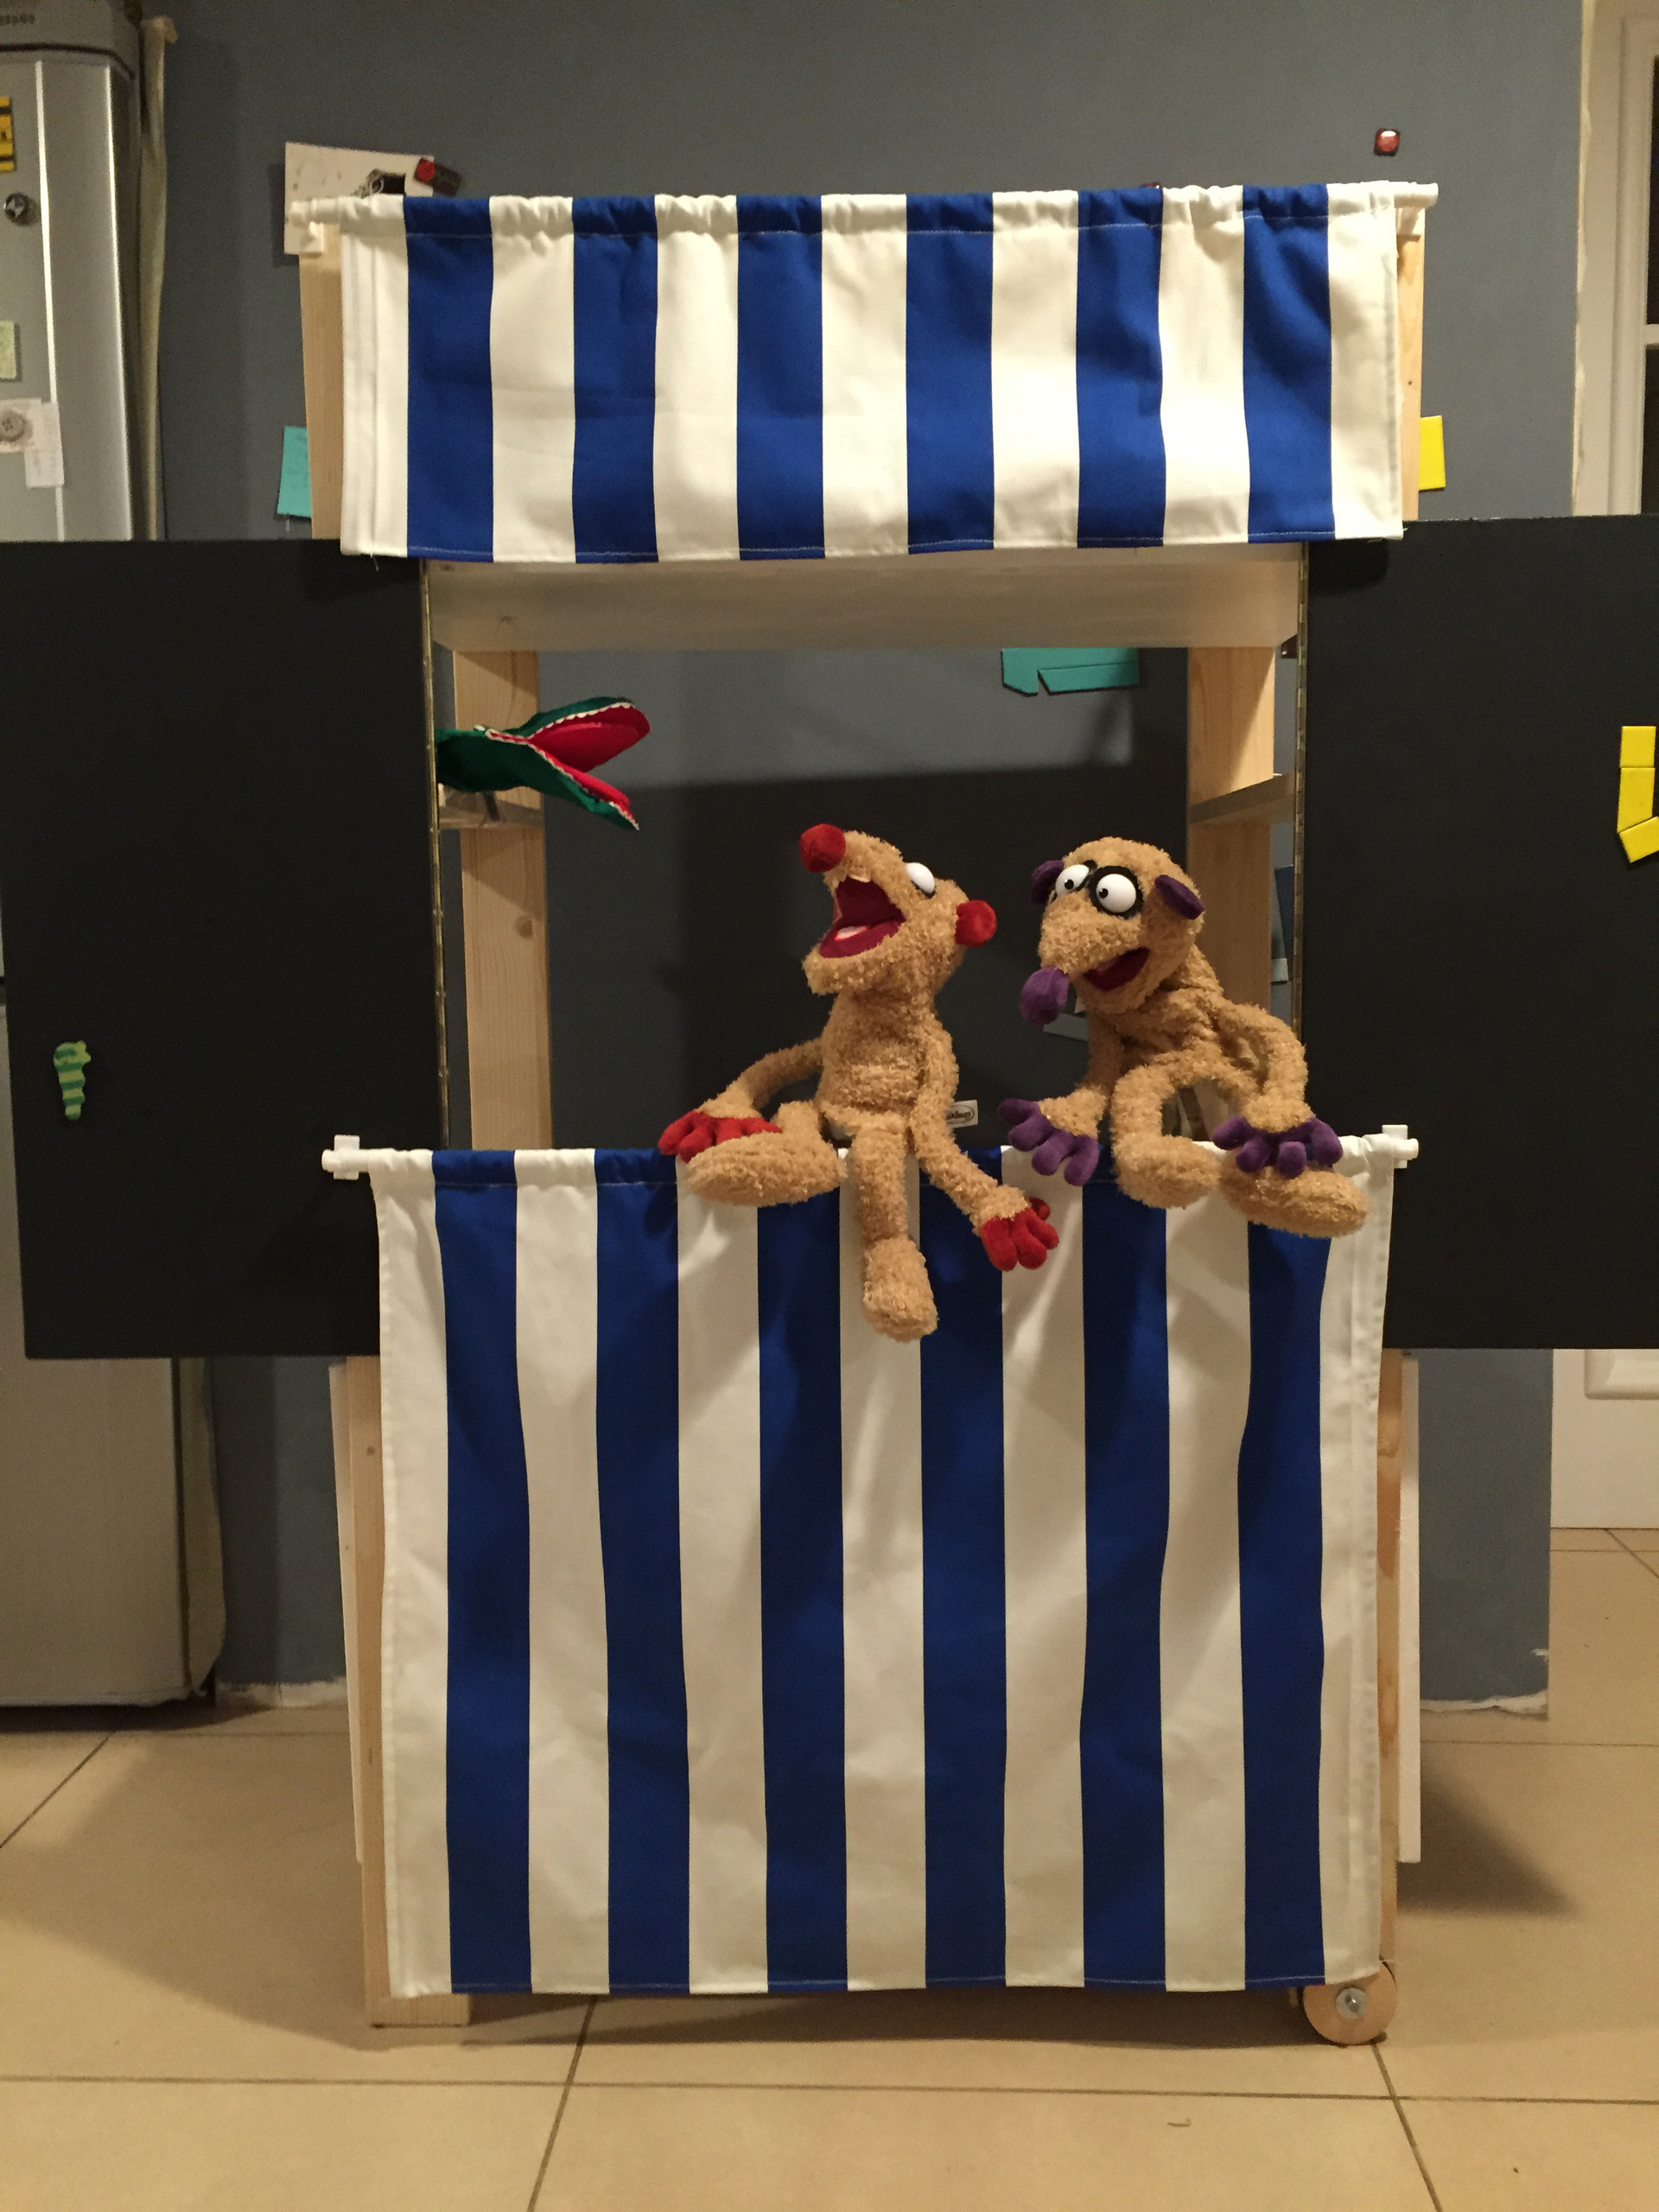
Pull-out curtain rods hold the curtains of the theater side. The cloth is SOFIA by IKEA, also available with red or green stripes.
Click the image to start a slide show
And when Kasperle, the princess, grand-mother, Seppl, the policeman and the thief are sleeping, Aleko's best friends Jan and Henry drop by for an extra show ...
Leave a comment
Giving your email address is optional. But please keep in mind that you cannot get a notification about a response without a valid email address. The address will not be displayed with the comment!