
Troubleshooting the IKEA RENGÖRA Anti-Flood Device
The machine beeps three times, continuously, no clean dishes. This acoustic alarm signal of the IKEA RENGÖRA means that the anti-flood device is on, that there is water in the machine in a place where it is not supposed to be. The instructions advice you to contact the service. But the service was not able to fix the problem in my case.
Leaving the machine alone for a couple of days may seem to make the problem vanish because the water that triggered the anti-flood device has simply evaporated. If the service then does not seriously examine the machine but holds speeches and plays with the knobs and buttons instead, chances are that the problem reappears in no time at all.
It is quite unlikely that the machine is really leaking. Most of the time, the machine is simply overfilled with water because the internal or external drains are blocked with grease and dirt. Three to four times per year, you should therefore run the longest washing program at high temperature with a special machine cleaning detergent. But that does not help if the drains are already blocked and the water flows over, triggering the anti-flood device.
The German engineer Herbert Sinner had coined the idea of the "Sinner Circle for cleaning. According to him, four aspects are key to successful cleaning: Chemicals, mechanical tools, high temperature and time. Translated to our problem that means that you should clean the inner world of the machine not only with chemical detergents but you should soak soiled drains with hot water and have patience. Recommended mechanical tools for cleaning the drains are an old toothbrush and Q-tips (cotton buds).
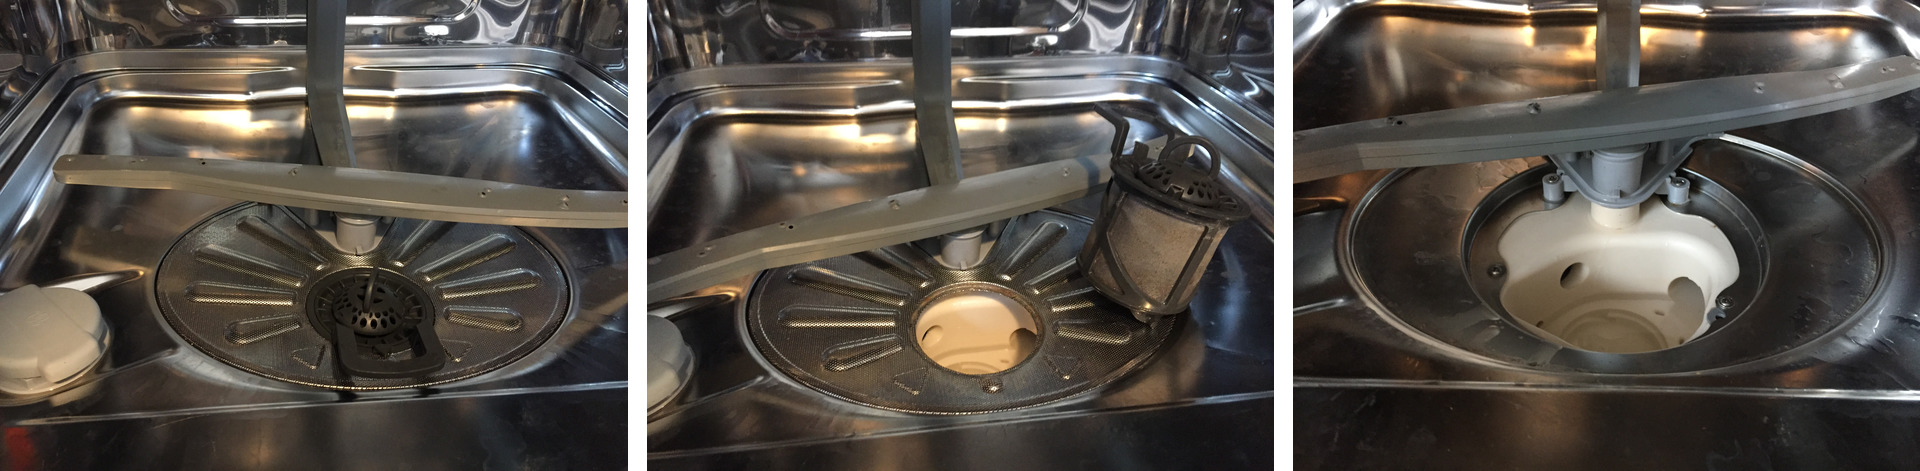
After removing the filters, you can clean all drains and the sump.
Should that not help, you have to run the machine without dishes at high temperature with some strong detergent, for example one of the machine cleaners that you can get in every drugstore. But you have to deactivate the anti-flood device during this time because otherwise the machine will stop working before the detergent had any chance to start working. But that requires you to explore the inner world of the machine but not quite in such a manner that you would void the IKEA warranty. Let's see how to do this!
Before you start disassembling the machine, make sure to disconnect it from the mains!
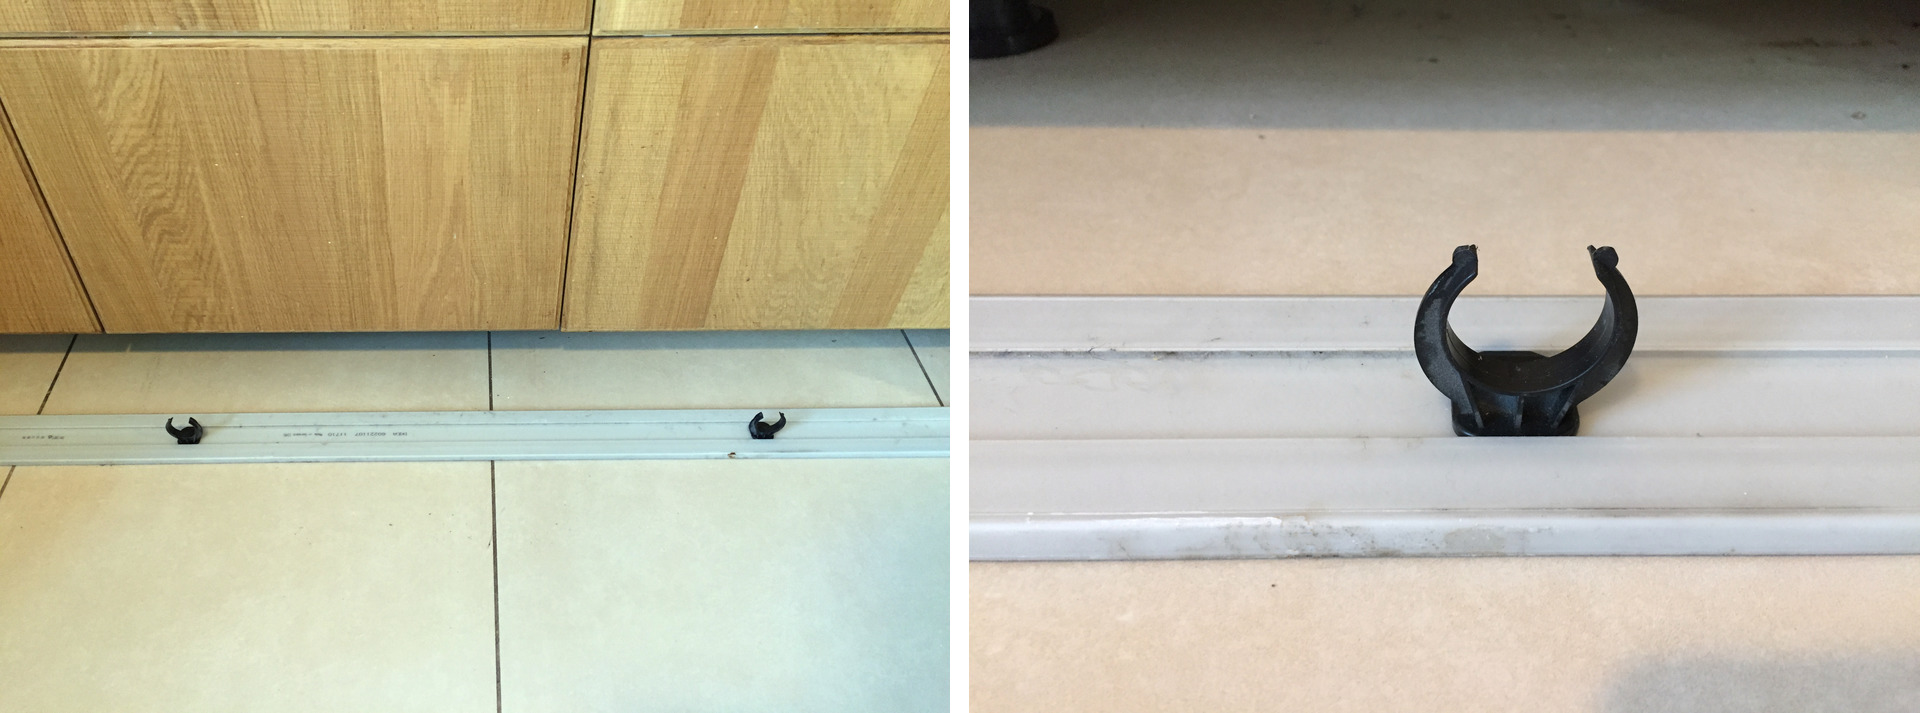
The kick-board at the bottom is attached to the feet of the closets with plastic clips and can be removed by pushing it back at one end so that it jumps out of the clip at the other.
When the door of the machine is open, you can see how it is attached to the closets with wood screws in the upper corners.

The front cover of the dishwasher can be easily removed, once you know how. Open the door to about one third, and find the two plastic hinges at the bottom left and right with your hands. Now push the two plastic strips that hold the cover in the hinge to the back and lift the cover up so that it is released from the hinges. There is no need to use force!
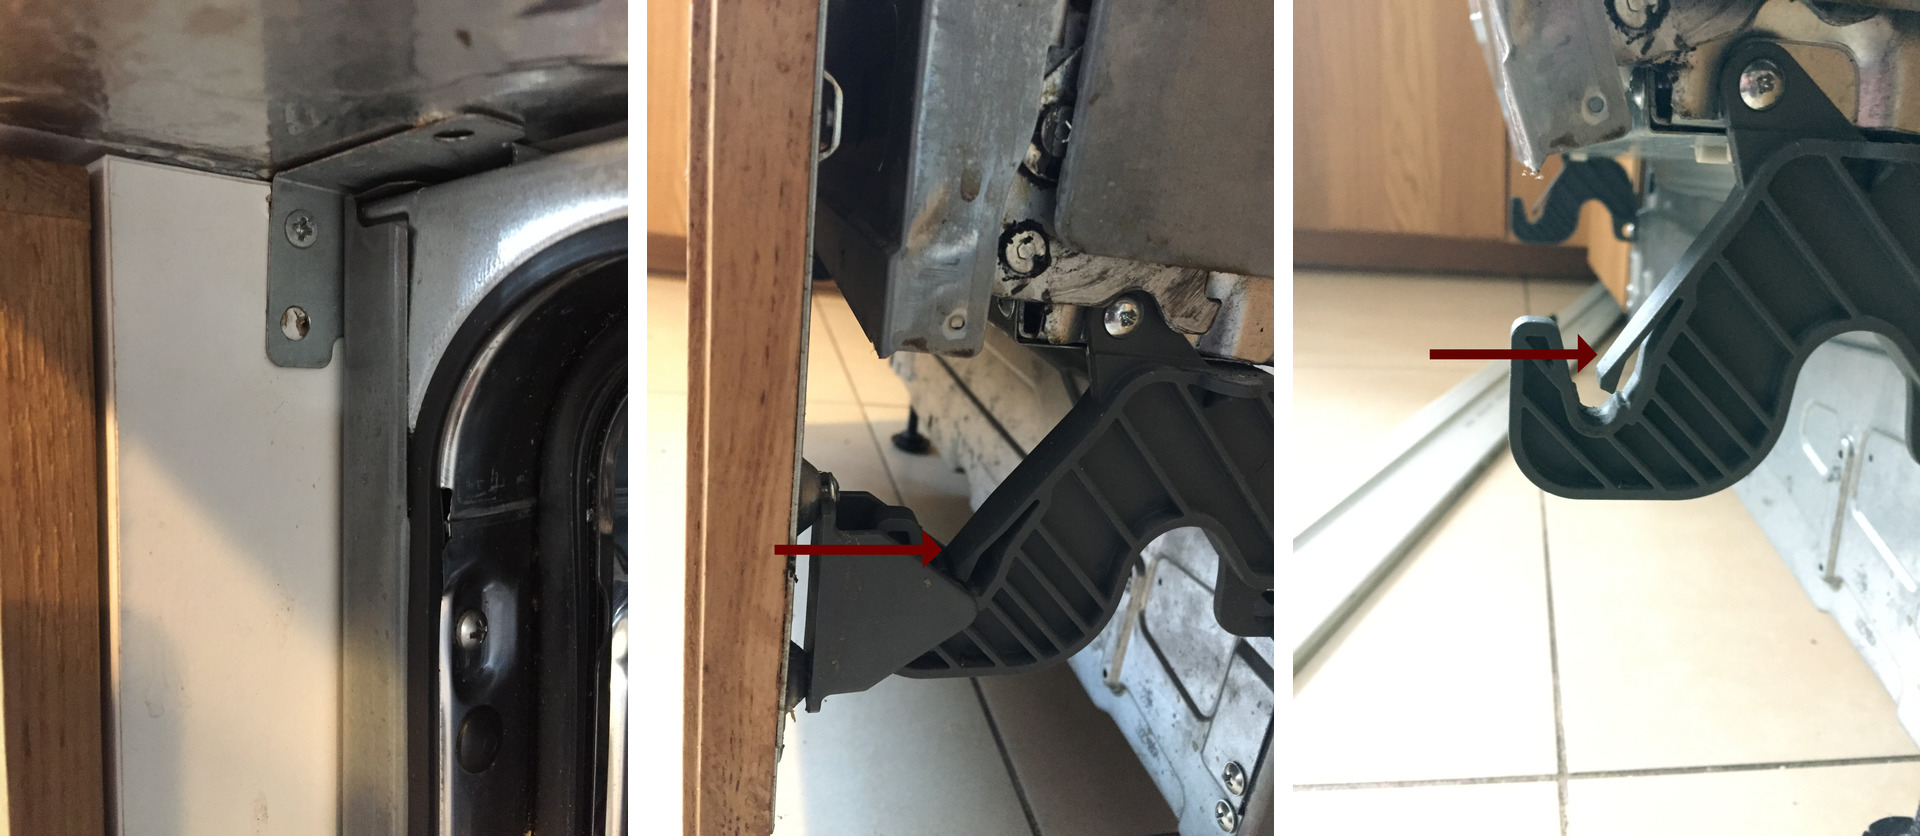
Now that the hinges no longer hold the cover, pull it upwards until you can pull it in your direction out of the fastening rails at the top.
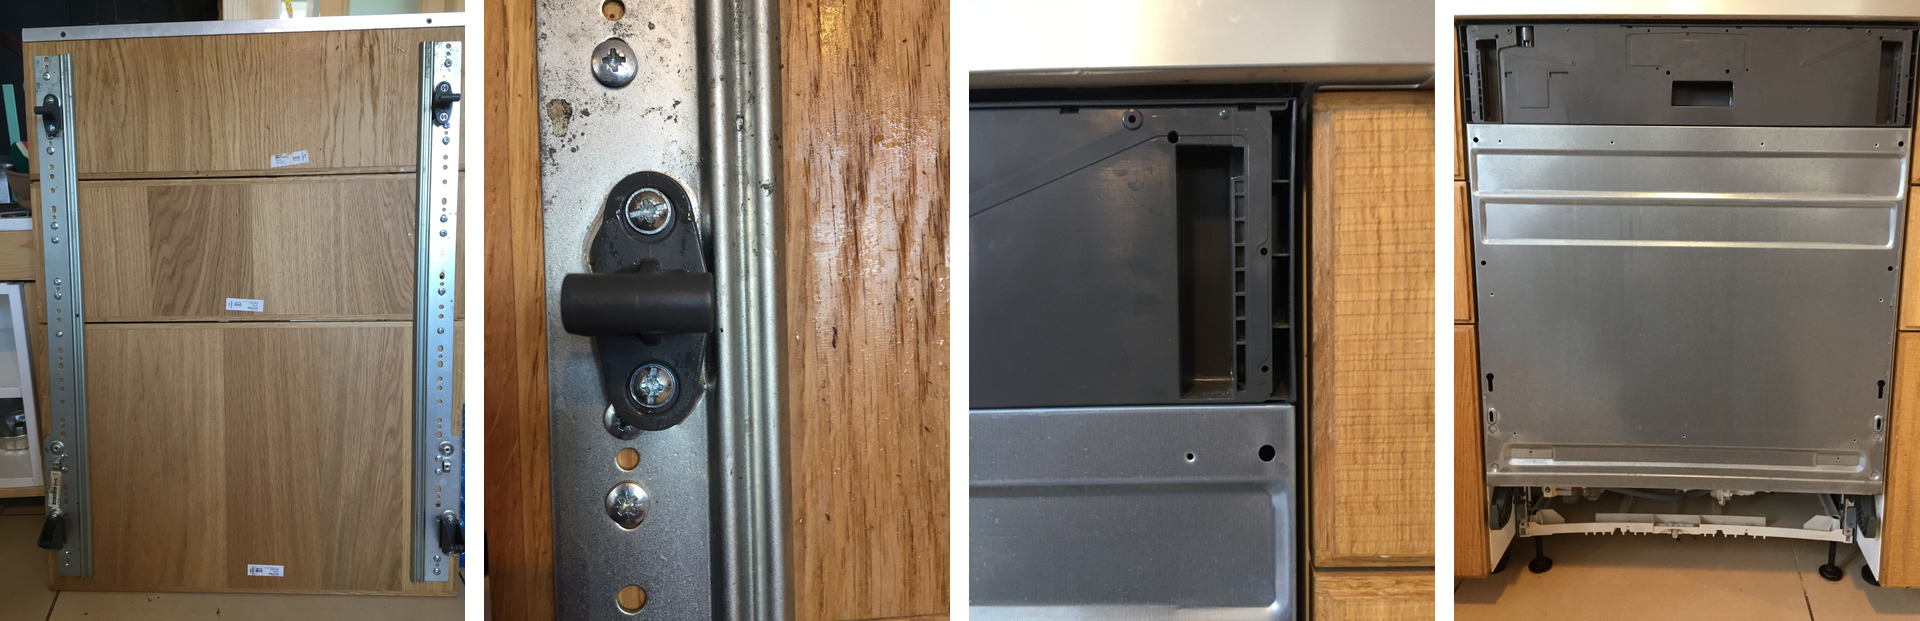
At the bottom of the machine front, you can see a metal cover fixed with three screws on both sides. You have to remove this in order to access the inner parts of the machine.
After the cover has been removed, you can see the plastic sump where the excess water collects. Towards the back you an see a white styrofoam float lever. The float rises when there is water in the sump and triggers the anti-flood protection program.
First thing you have to do now is to dry the sump with cloths and sponges so that the float lever is no longer lifted. Once everything is more or less dry you can continue the diagnosis.
At the front you can see two grey plastic hoses of about 1 cm diameter. In case the machine is overfilled, the excess water is drained off through these level drains into the sump below, where it activates the anti-flood device.
The ends of the two hoses are attached to the machine with two white plastic clamps. Carefully remove them out of the clamps and put them into a bowl in front of the machine. Excess water will now no longer trigger the anti-flood protection so that you don't have to remove the water from the sump which is not only tedious but also dangerous while the machine is running. But, please, have a close look exactly how and where the two hoses are attached before you remove them, so that they will be at their right place when you reassemble the machine.
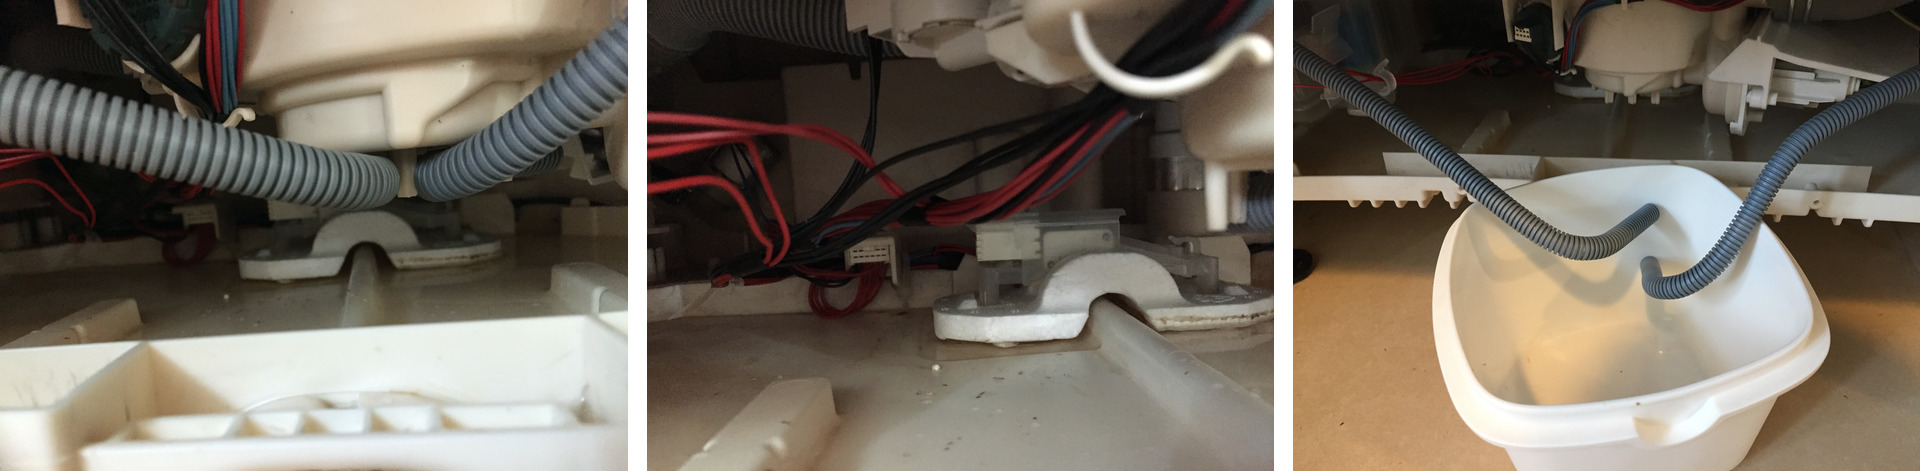
From left to right: 1) the level drain hoses 2) The anti-flood device made of styrofoam 3) The hoses removed from the clamps.
Now start the shortest program of the machine and watch. Of course, you have to reconnect the machine to the mains and for obvious reasons you should not leave it unattended in this state.
Without fail, after some time water will drip or spill out of one or two of the level drains. You can now try once more to clean the filter and all drains with Q-tips, toothbrushs, hot water, cleaning detergents and so on.
And when it does not help? Start the machine without dishes at high temperature. Use a special machine cleaning detergent if you have it at hand, otherwise your normal detergent.
I must admit that I have not completely understood, how the machine controls the level of water inside. But grease and other soil obviously has a negative impact on the functioning of this control. Since the water now flows into the level drains and not into the sump where it would trigger the anti-flood program, you have all the time to run one or more cleaning runs, until everything is clean again and the water stops spilling.
But once again! Do not leave the machine unattended during the cleaning runs! The current-carrying parts inside the machine are not protected against touching them and even the largest bowl will be full at one point ...
Once that the machine finishes one program without spilling water from the level drains, you can reassemble it in the opposite order. Make sure that the two level drain hoses are correctly attached so that leaking water is led into the plastic sump and not on current-carrying parts!
Leave a comment
Giving your email address is optional. But please keep in mind that you cannot get a notification about a response without a valid email address. The address will not be displayed with the comment!