Ad Hoc Web Servers the Easy Way
Displaying a bunch of html files in your own local web server is easier than it sounds. The package manager npm for the web application framework Node.js comes with a zero-configuration http server that can be started within seconds without any configuration.
Installing npm and Node.JS
If you have not done so yet, install the node package manager npm which is a Node.JS application.
Mac OS X
Normally the the best way is to use the official installer for Node.JS. The packager manager npm is included in the installer.
If you have installed Mac Ports it is probably better to install the port instead:
sudo port install npmOr with homebrew you do:
sudo brew install nodeMicrosoft Windows
Use the official installer for Node.JS!
Linux
Either npm or Node.JS will be available as a package for your distribution. If there is a separate package for npm, then install that, because it will install Node.JS as a dependency. Otherwise just install Node.JS which will contain npm. The package name of Node.JS will be "nodejs" or just "node", depending on your distribution.
Running the Ad Hoc Web Server
Installing the HTTP Server
The http server is a Node.JS package http-server and will be installed via the command line:
$ sudo npm install -g http-server
/opt/local/bin/http-server -> /opt/local/lib/node_modules/http-server/bin/http-server
/opt/local/bin/hs -> /opt/local/lib/node_modules/http-server/bin/http-server
http-server@0.9.0 /opt/local/lib/node_modules/http-server
├── opener@1.4.1
├── corser@2.0.0
├── colors@1.0.3
├── http-proxy@1.13.3 (eventemitter3@1.2.0, requires-port@1.0.0)
├── optimist@0.6.1 (wordwrap@0.0.3, minimist@0.0.10)
├── ecstatic@1.4.1 (url-join@1.1.0, he@0.5.0, mime@1.3.4, minimist@1.2.0)
├── union@0.4.4 (qs@2.3.3)
└── portfinder@0.4.0 (async@0.9.0, mkdirp@0.5.1)
Windows users omit the "sudo" here.
Starting the HTTP Server
Now change to the directory that contains your html files and start the server:
$ http-server -oThe option -o will start your default browser automatically. You will either see a listing of files or a web page if the directory contains a file index.html or index.htm.
If you want to see everything in a different browser point it to the address http://127.0.0.1:8080/.
Stopping the Server
If you want to stop the server either close the command-line window or hit Ctrl-C when it is in the foreground.
Starting Multiple Servers
Start a second http server in parallel will not work because the address is already in use. In that case you can start the server on a different port number, for example 8081:
$ http-server -o -p 8081If port 8081 is also in use try a random number between 1024 and 65535 until you find a free port.
Browsing On Mobile Devices
If you configure your firewall accordingly, you can also browse your ad-hoc site on mobile devices. When you start a server, the list of available addresses is printed out:
Starting up http-server, serving ./
Available on:
  http://127.0.0.1:8080
  http://192.168.1.2:8080
Hit CTRL-C to stop the server
The first IP 127.0.0.1 is always the same and only reachable from your own computer. All other IPs can be accessed from within your network.
If you are too lazy typing the address into your mobile browser, you can use QR codes. Copy the address with CTRL-C into the clipboard, go to one of the many online QR code generators, paste the address with CTRL-V and scan the QR code with a QR code scanner app.
Watching Changes With Browsersync
It is even possible to make the browser reload a page as soon as you change one of the files in the directory. If that sounds fun for you go ahead:
Install browser-sync with the command
sudo npm install -g browser-syncor justnpm install -g browser-sync.Start the web server with
browser-sync start -s -wand enjoy.
Die option -s starts a server. The option -w has the effect that the server watches files for changes and makes the browser reload the page, whenever a source file has changed. And --open index.html opens the file index.html in the default browser.
Whenever you modify the displayed file, the page is automatically reloaded. Usually that happens in fractions of a second, so fast that you don't even notice it. If a ressource in that page changes, for example an image or a stylesheet, the DOM of the page gets updated without a reload and only that particular part is updated.
If you want to enable directory listings add --directory to the command line options. And, by the way, you can start as many instances of Browsersync as you want. It will pick the next free port if its default port 3000 is occupied.
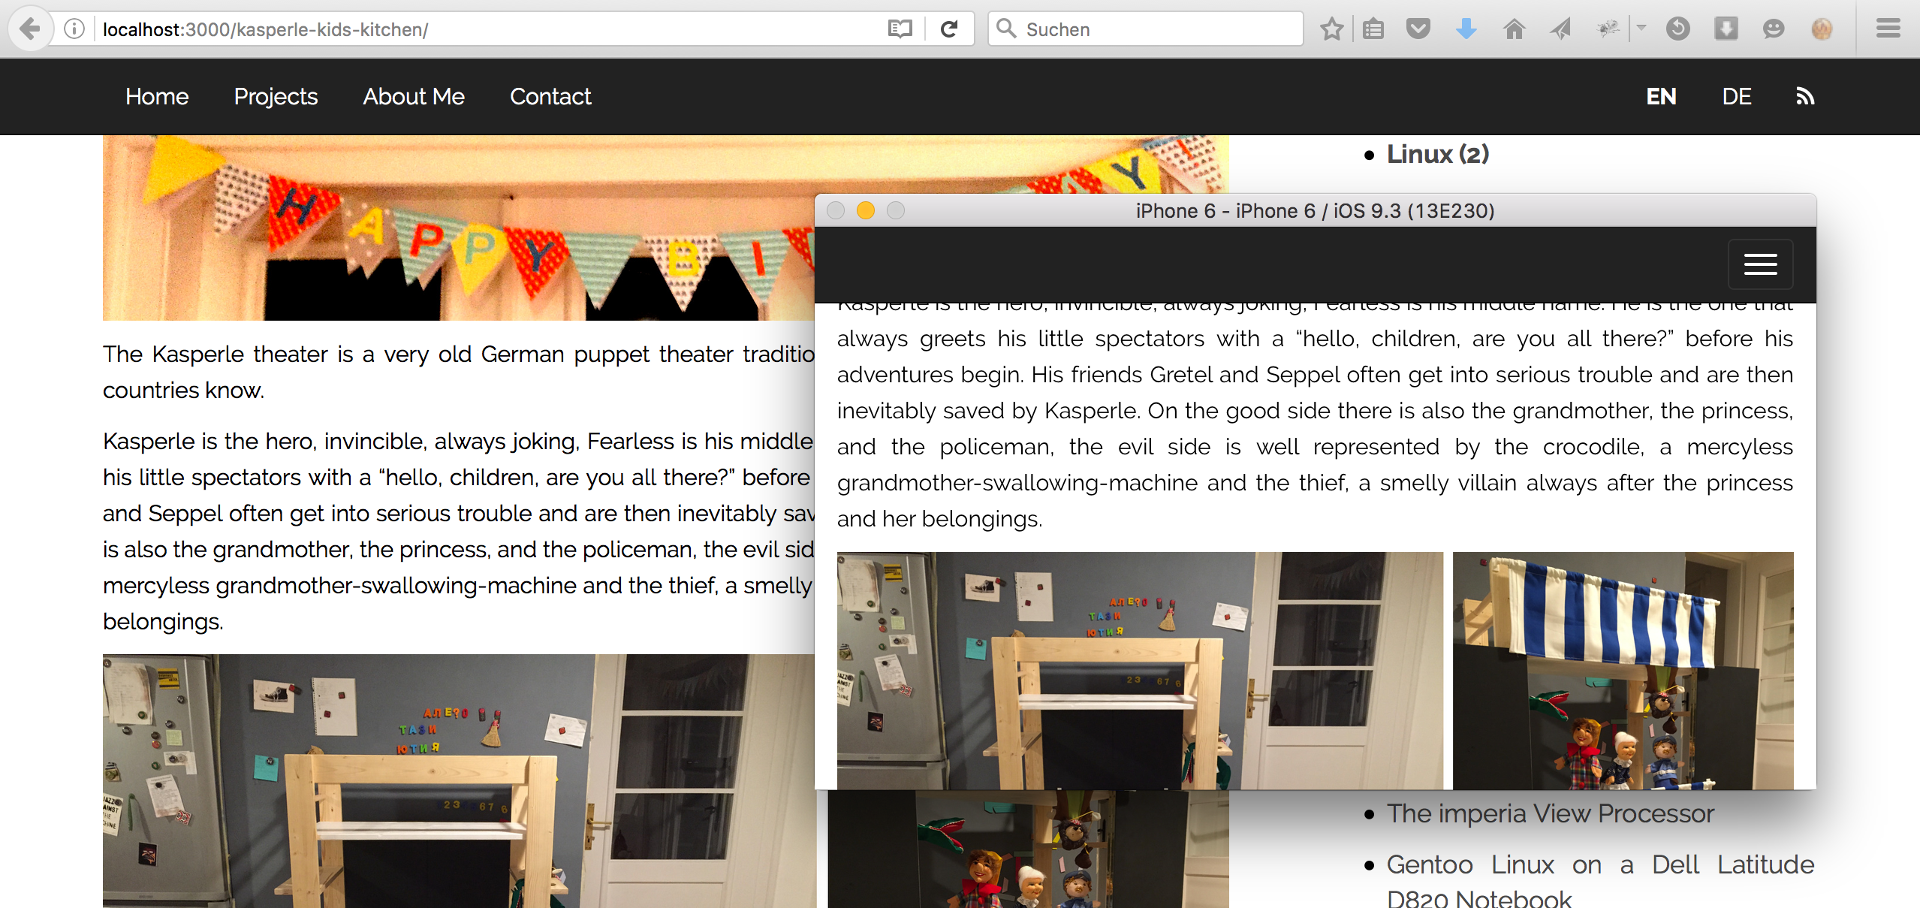
The real fun with Browsersync starts, when you point a second or third browser for example on your phone or tablet to your local server. All browsers are synchronized, all mouse clicks, inputs or other user interactions are mirrored across all connected devices.

Synchronizing browsers with Browsersync
And wouldn't it be cool to present your new company web site instead of local files and let all people around you follow while you are clicking, scrolling and sending forms? A piece of cake with Browsersync: browser-sync start --proxy http://www.yoursite.com. Now everybody connecting to your local server will see http://www.yoursite.com instead. But be aware that the synching is unidirectional! Everybody connected can control the browser of everybody else.
By the way, Browsersync comes with tons of other features that can be explored by visiting the address http://127.0.0.1:3001 (or whatever other UI address was printed out in the command-line window).
Of course, you should only experiment with these ad-hoc servers in trusted networks or after securing them a little. http-server --help or browser-sync server --help give instructions for that.
Leave a comment
Giving your email address is optional. But please keep in mind that you cannot get a notification about a response without a valid email address. The address will not be displayed with the comment!