
Ullrich Sport U4P Foosball
The new office finally has enough space for a foosball. Although Italian brands are more popular over here in Bulgaria, I prefer the German style. And yours truly wanted a model with serving-holes as this is more suited for non-professionals like us. After some intensive research I opted for the Ullrich Sport U4P that offers top quality at a very competitive price.

Another big plus was the competent consulting on the telephone and the fact that the shipping to Bulgaria was no problem for Ullrich Sport, contrary to other vendors and distributors that either did not ship to Bulgaria at all or only at prohibitive prices. Ullrich Sport charged 120 euro for delivery, a fair offer.
The branding for cantanea was also handled in a professional and affordable manner. Ullrich Sport does the entire foil design, including materials, printing, and attaching. All you need to provide are the vector graphics with your corporate design.
The only fly in the ointment was the month long between payment and shipping. Although --- to be honest --- I don't remember what delivery time was initially offered.
Thanks to DHL, the delivery became a real surprise. They had promised to announce the delivery at the door by telephone. Instead, one evening the buzzer rang and 100 kg of foosball were waiting for us on the street and had to be carried two floors upstairs with the only colleague staying with me in the office at that time.
Assembly
Required tools:
- 2 hex keys 6 mm
- 1 hex key 3 mm
- 1 Phillips screwdriver
- 1 hammer
- 1 bubble level
- 2 thick books, two pieces of wooden countertop or something similar
- maybe 1 pin punch 3 mm
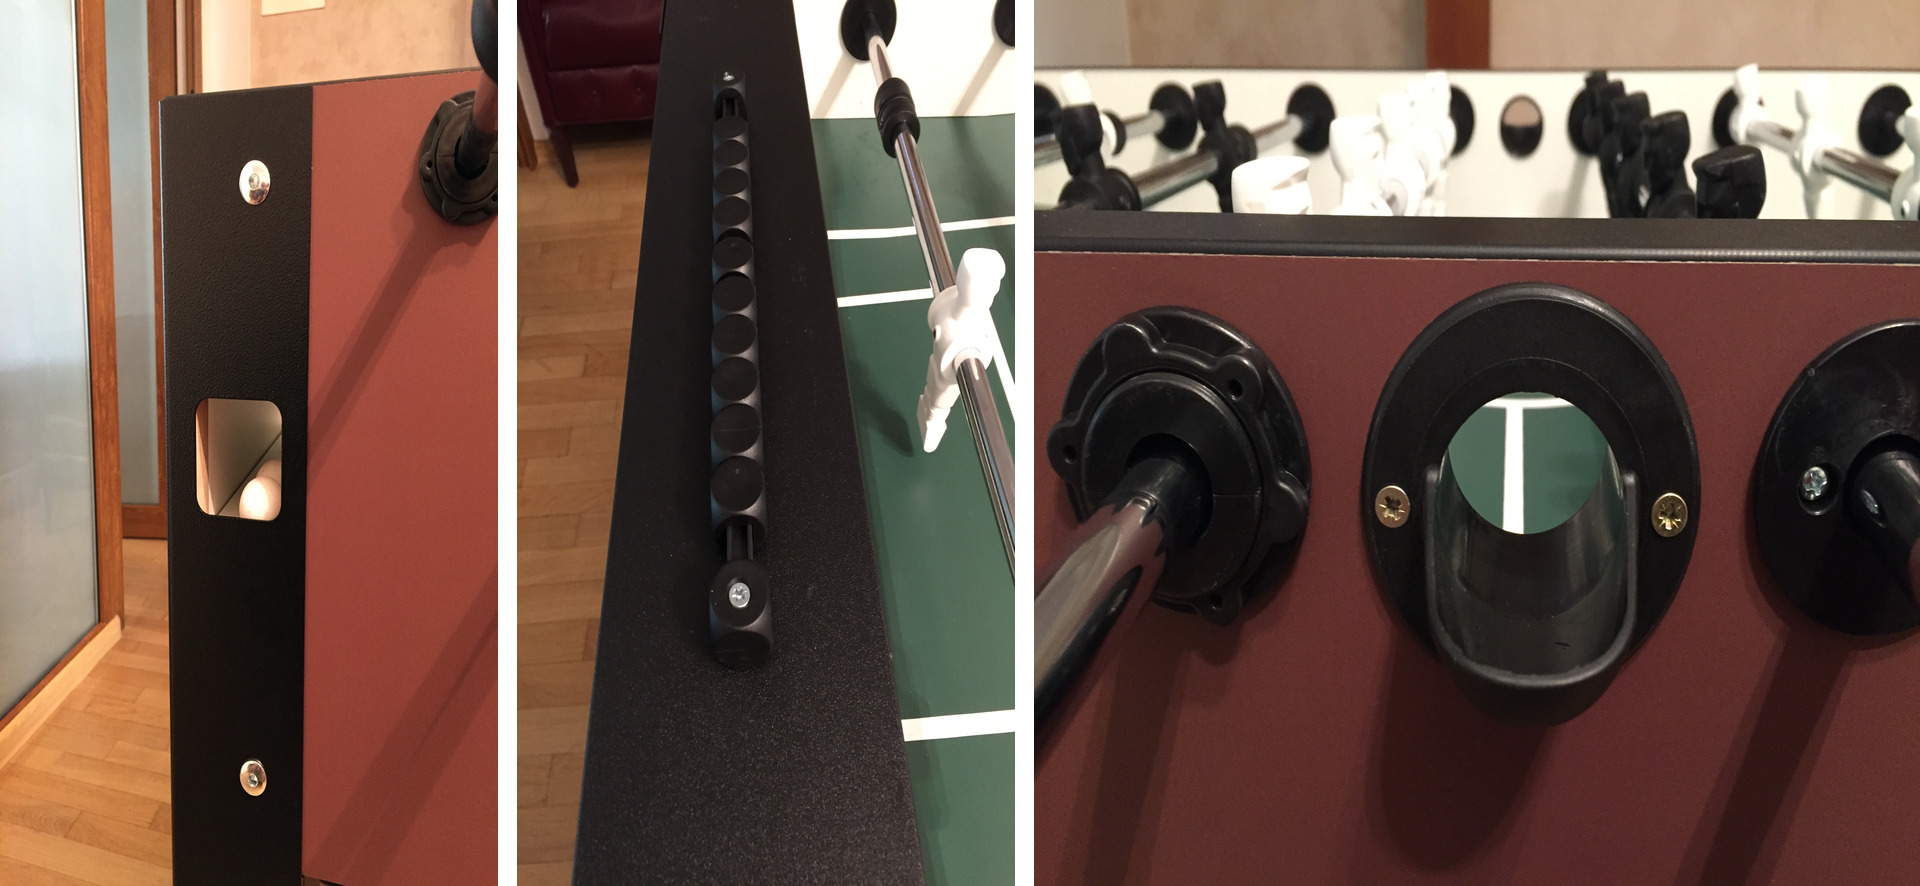
The boxing of the table is absolutely sufficient, and everything arrived without any damage. The table ships mostly assembled. The only heavy lifting left is the mounting of the table legs, a work that should not be done alone. The easiest method is to place the body of the foosball on a stable table protected with a blanket or cardboard. Before you can mount the legs, you have to unfasten the four truss head sex bolts at the long sides of the table with a 6 mm hex key.
These nuts hold four threaded rods hidden inside the table that stabilize the construction. The two upper rods can be reached with the hand through the goal openings, the lower ones from underneath the tables.
Fasten the sex bolts by hand first, just enough for the threaded rod not to fall. When the legs are attached, unscrew the nut on one side of a rod, pressing the other one with your hand inside the body of the table and your helper holding the rod so that it will not turn with the nut. Turn the nut five times, and then fasten the nut on the other side with a second hex key until fastened. I could imagine that these sex bolts can work loose under heavy usage and should be re-fastened regularly.
Now carefully transfer the foosball from the table onto the ground.
You can fill the hollow legs with sand in order to make the table heavier. That is best done now, while mounting, but you can also leave that decision for later. The upper opening of the legs is still accessible.
Once the foosball has been transferred to its final destination, you have to adjust it with a bubble level that you place on the pitch. Put the pitch to the scales with the four adjustable feet.
Move the metal goal plates through the goal openings into the space behind, place it in the horizontal groove between two dowels and just let it fall to the front so that it forms a roof with a 45 degree angel at the top of the goal.
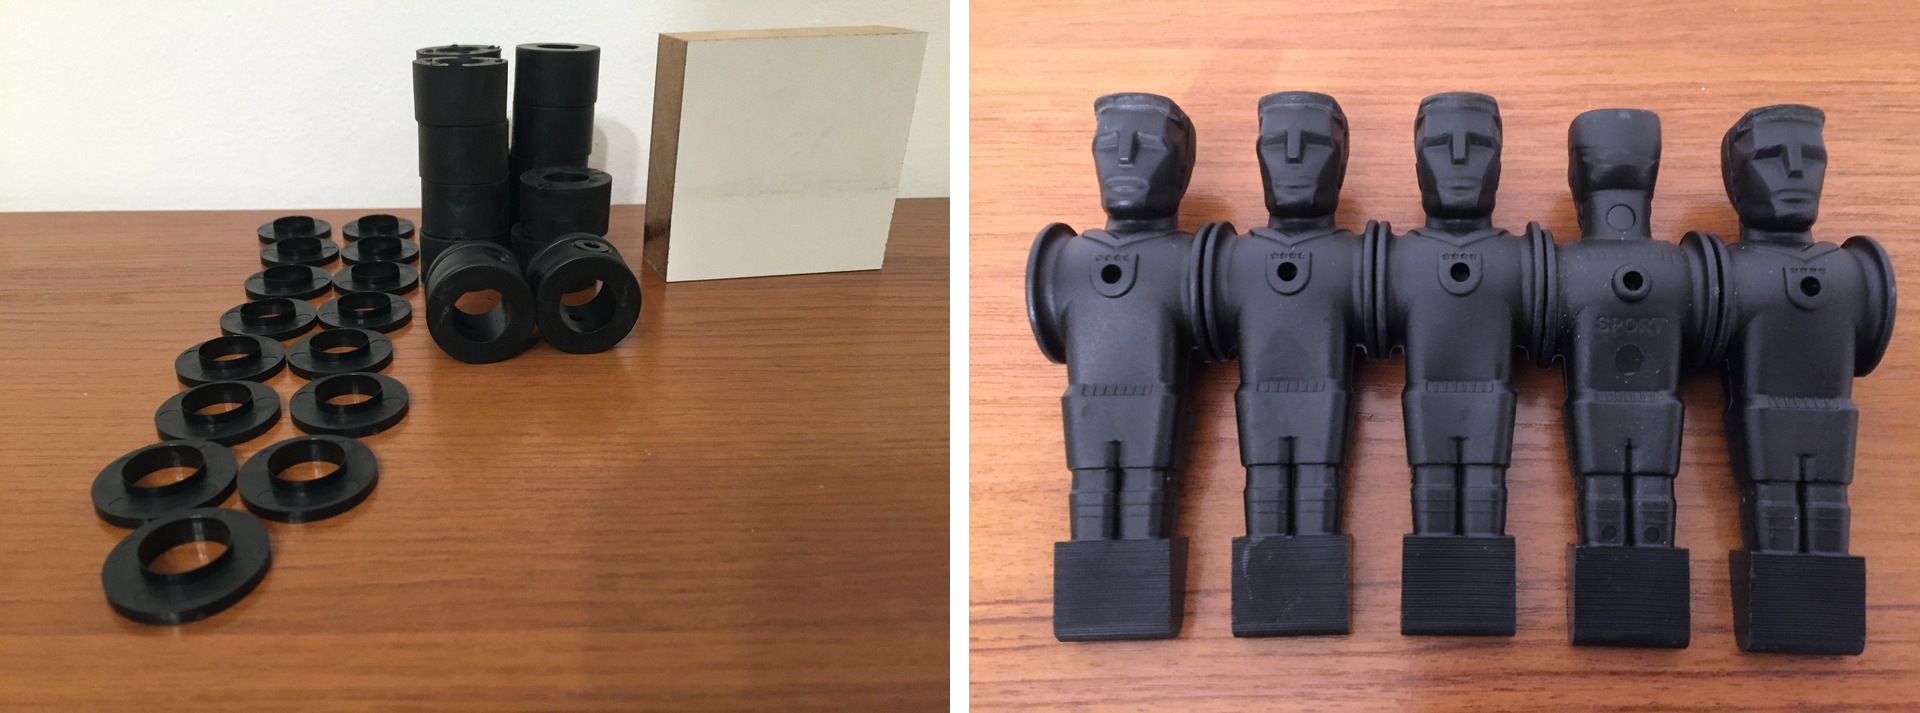
The serving-holes and the goal counters must be fastened with wood screws. The pre-drilled holes make that very easy. The screws for the goal counters are longer than those for the serving-holes (that were missing in our kit, by the way). Do not confuse them or you will ruin the cushions!
from left to right: Screws for the legs, the serving-holes and the goal counters
The U4P is equipped with hollow bars and splinted men by default. At the end of the day the assembly is actually simple but still, a little bit of instructions by Ullrich Sport would really not hurt. Short of help from the vendor, watch out for false advice from the internet here! The first hit on Youtube showed an absurd show by a lunatic splinting the men on the mounted bars. This is nonsense!
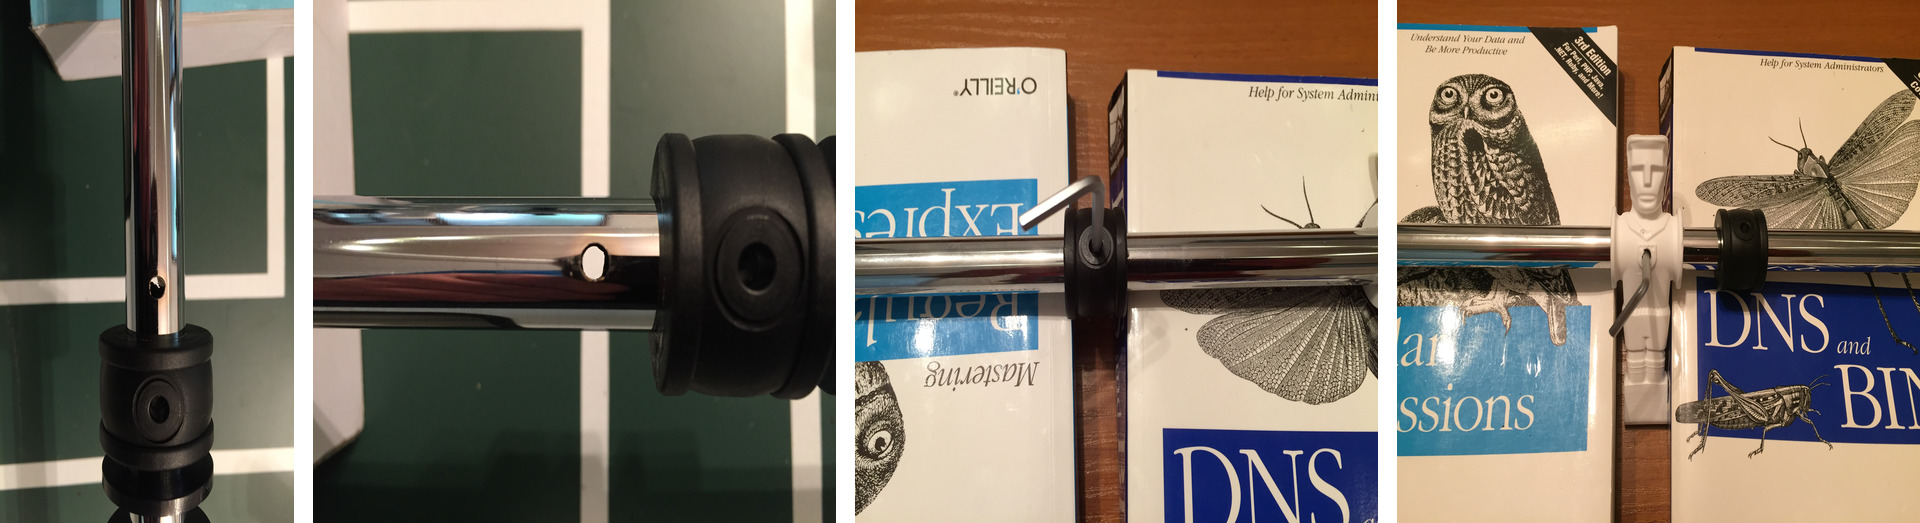
The U4P ships with take-apart friction bearings. You can easily insert and remove all bars with all men, buffers, and stoppers mounted.
Stay focused, when mounting the bars. If you have a soft spot for stupid mistakes, you will find lots of opportunity, when you assemble the bars.
One set of bars consists of 8 pieces. The two shortest ones with five holes are for the midfielders (five men each), the two longest ones with two holes are for the defenses (two men each). The two medium-sized bars with three holes are for the atackers (three men each) and the two goalies.
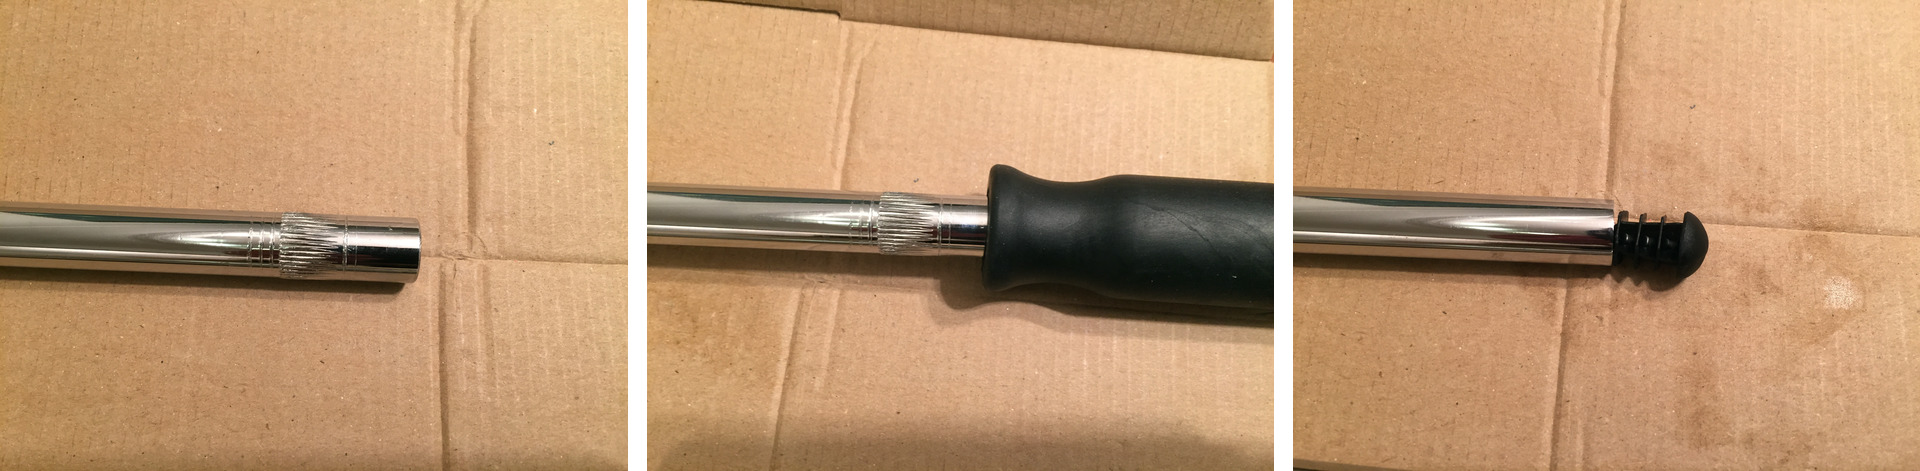
Start with the goalkeepers' bars. Push the rubber handle over the fluted side of the bar. You can make your life easier by bathing the handles in hot water for a couple of minutes. They will slightly expand and the water on the surfaces will make the movement easier.
The smooth side of the bar should be closed with a plastic lid.
Push the various parts onto the rod. Start with the friction bearing (the plastic ring) but in the right direction! The smaller ring is supposed to be pushed into the rubber buffer. The flat side must point towards the handle, so that the friction bearing can later rotate freely on the cushion.
Next comes a rubber buffer. The inner ring of the bearing must be pushed into the buffer holding the bearing in its position.
Continue with one of the plastic stoppers and then the goalie. Once more, take the opportunity to check that the goalkeeper looks in the right direction. Holding the handle in your left hand, the player must look to the right. You have to remove everything later if you make a mistake here.
Now continue in opposite order. After the goalie, add another stopper, then the rubber buffer and finally the plastic bearing, with the flat side pointing to the end of the bar.
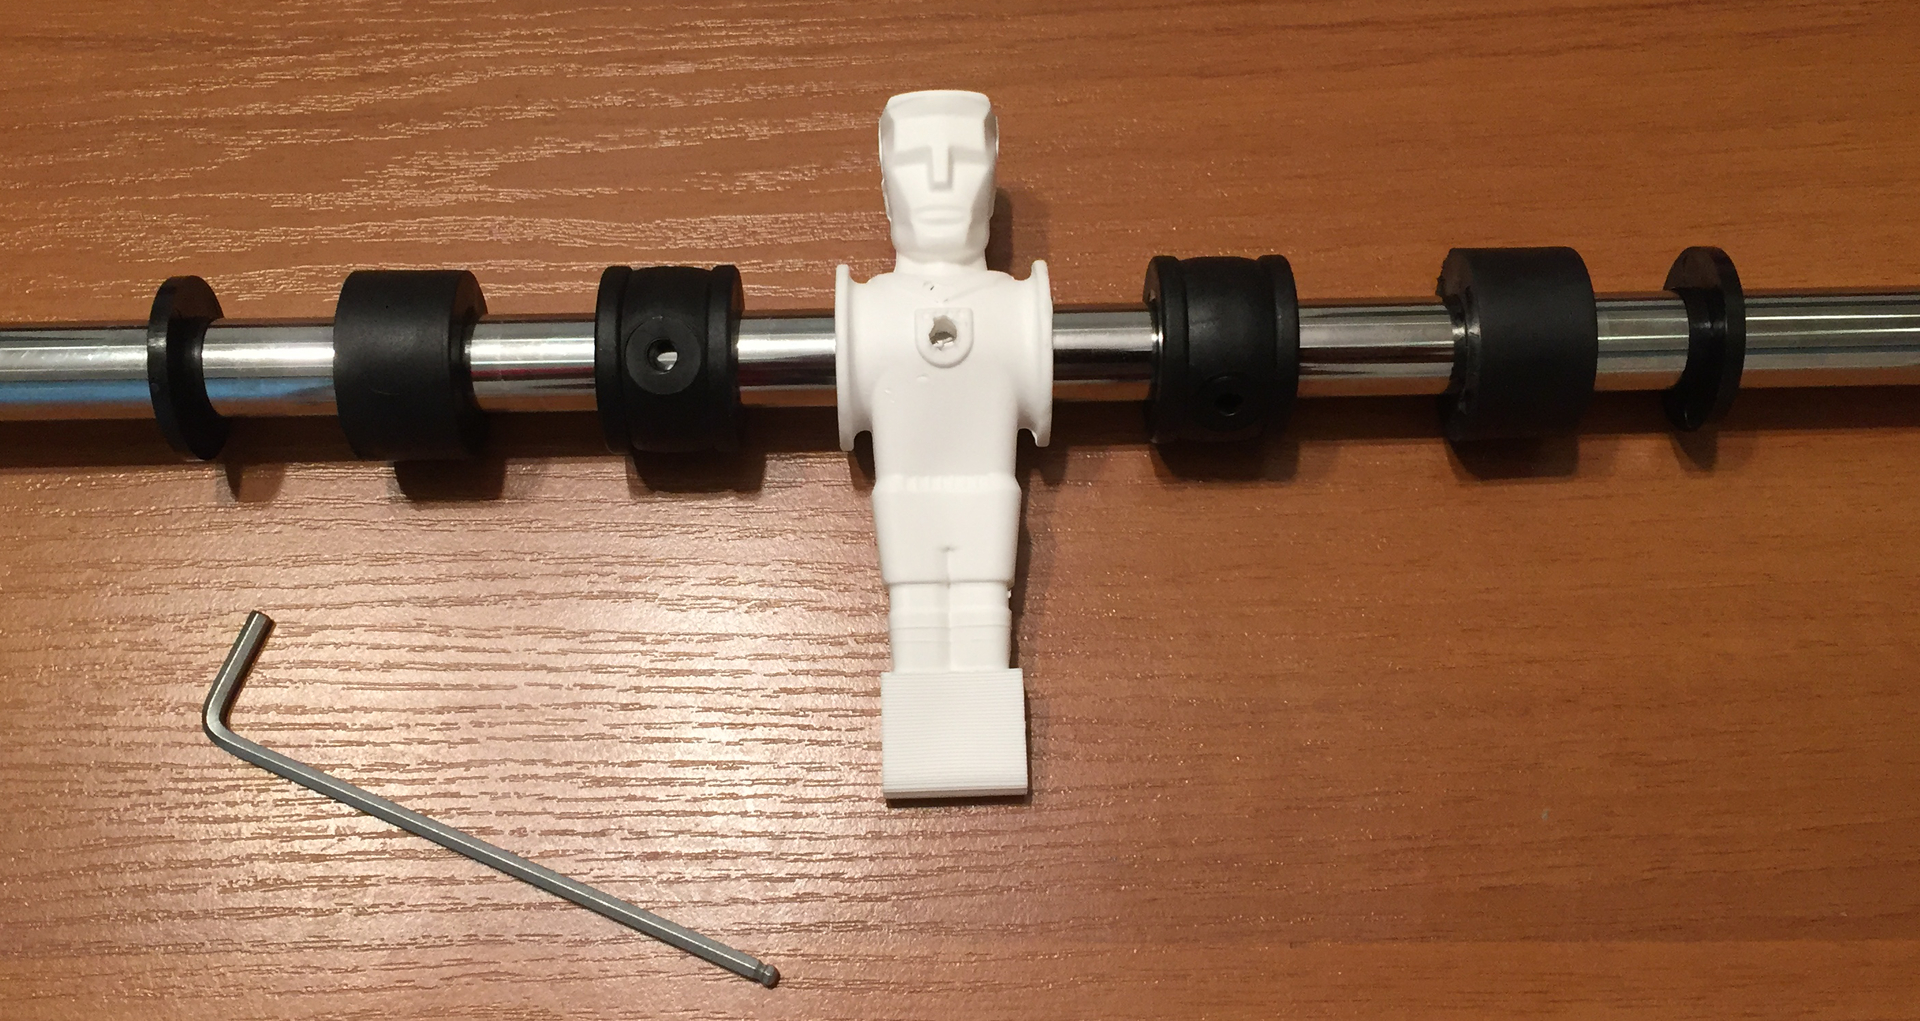
Placement of the parts on the bars
Place the bar on two thick books or similar for splinting, positioning the part to be splinted between the books. You should deflesh the holes in the bar and all plastic parts before splinting. A 3 mm hex key will do the job alright.
You can fine-tune the exact position of the part to be splinted on the bar with the same hex key. All holes in the plastic and metal should flush and should be fully open before you start hammering.
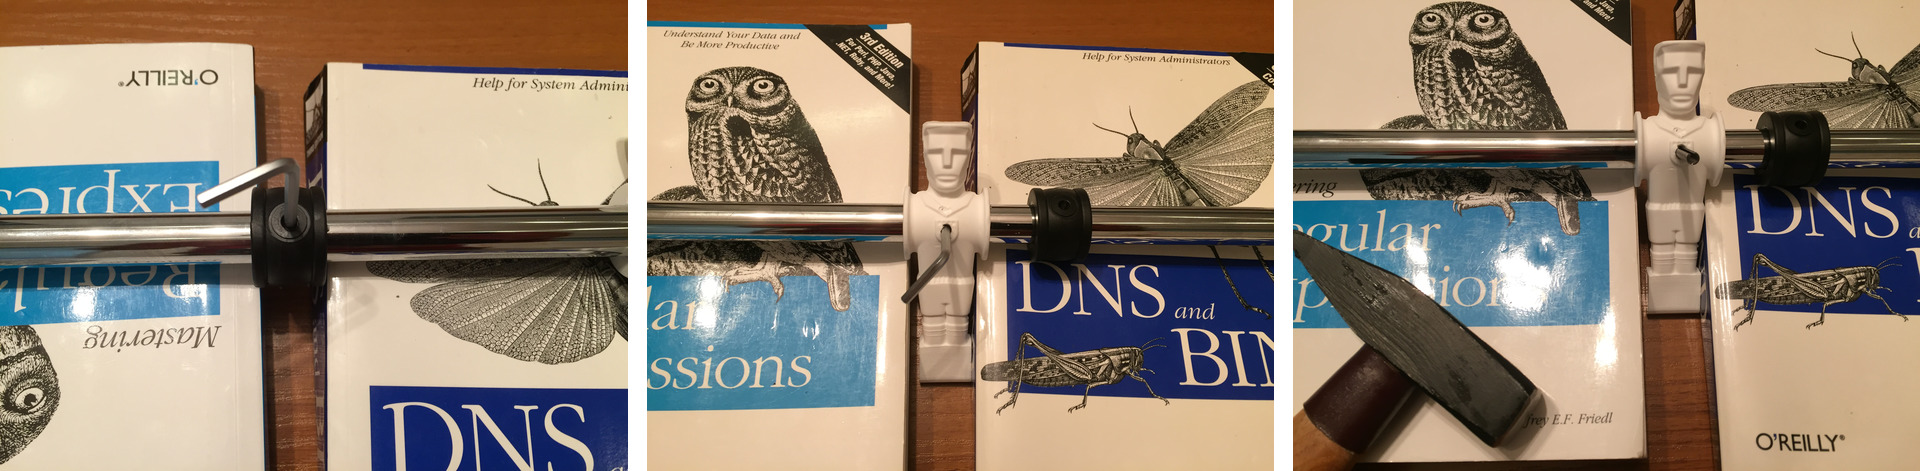
When everything fits (does the player really look in the right direction?), start driving the splint with a couple of vigorous hammer beats. Re-check the correct position in case the splint doesn't move. Repeat the process for all three parts that have to be splinted, that is the player and the two plastic stoppers.
Continue with inserting the bar into the foosball. Unscrew the outer ring from the take-apart friction bearing, push the rest inside onto the pitch, and disassemble the inner part into its two components.
Now move the handle through the big hole that is now free, and push the bar through to the end. The other side with the plastic lid can now just be inserted into its hole. Put the two inner parts of the bearing back together, around the bar.

Push the two plastic bolts of the inner bearing into their holes inside the cushion, and finally push the outer ring over the handle and the bar, fastening it with the inner part of the bearing.
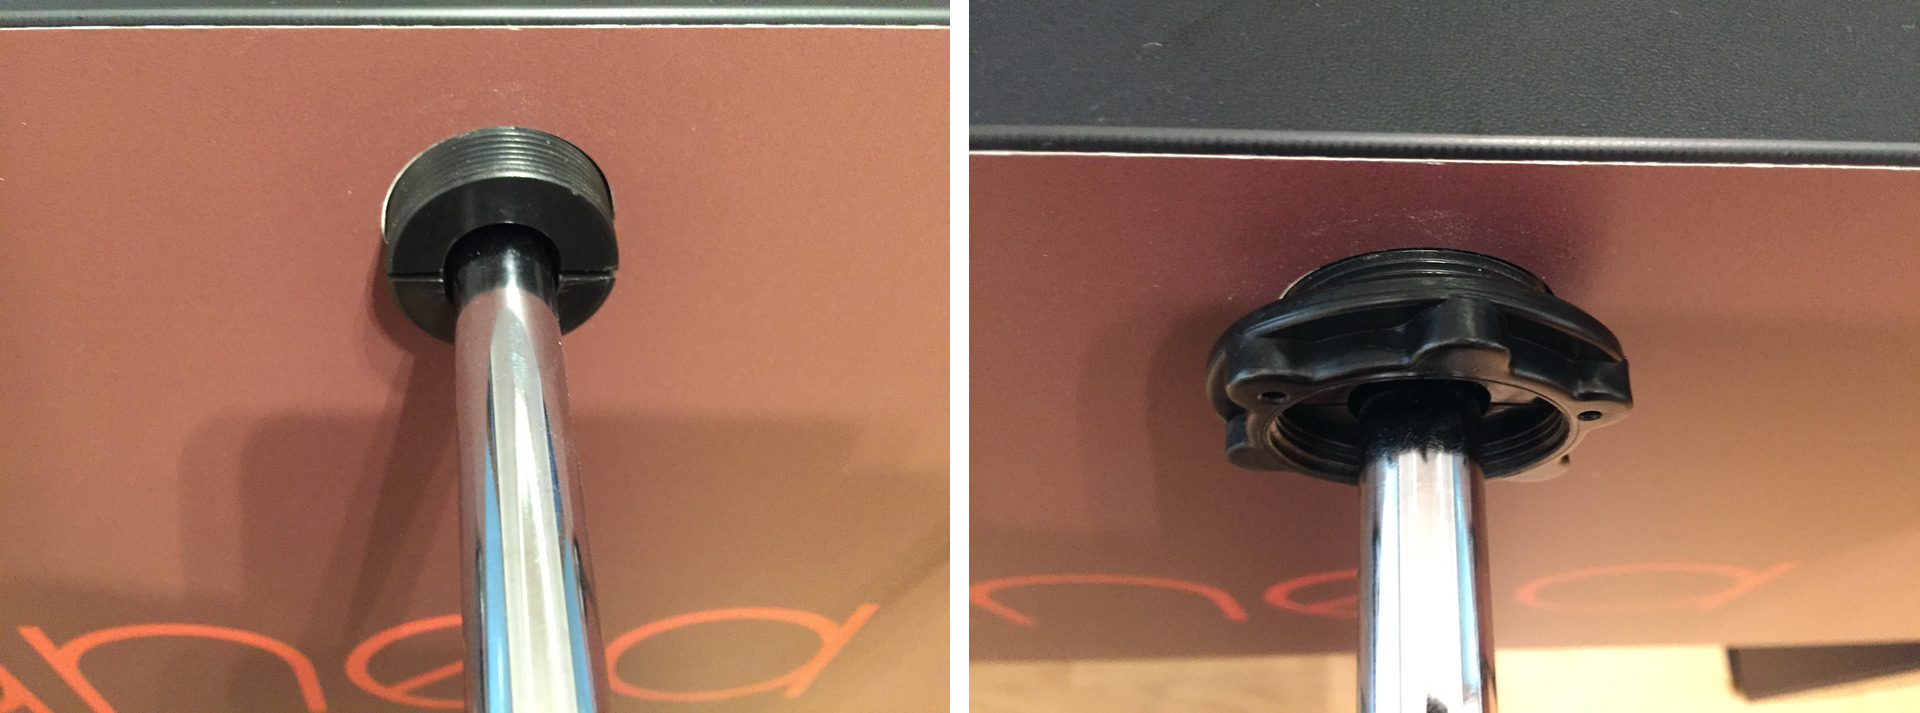
You went for a screwdriver? Then you must be playing around with the wrong bearing. The right one is on the other side and you can take it apart by hand, without a screwdriver. Re-read the above and have a close look at the pictures!
Repeat the process for all 8 bars. The plastic stoppers are only splinted on the goalkeepers' bars, omit them for the others!
And what if despite all due diligence one of the players has to be removed? You can drive the splints out with a 4 mm pin punch. Most pin punches are octagonal. Mine is round which is probably better for this purpose. In doubt, order a suitable pin punch from Ullrich Sport.
Removing the rubber handles is a little bit troublesome. Bathing them with the bars for a couple of minutes in hot water helps. You will be able to remove the handles with vigour, jerky pulls. It is probably best to do that in a bench vise, protecting the bar with a soft cloth so that it won't get scratched.
Before you start playing, apply a little bit of silicone spray to both ends and distribute it by turning and pushing the bars in all directions. Do not use oil or grease as it will become sticky.
And now have fund with your new foosball!

Leave a comment
Giving your email address is optional. But please keep in mind that you cannot get a notification about a response without a valid email address. The address will not be displayed with the comment!